Managing wear and tear in your Cornish holiday cottage is essential to keep it in great shape for your guests. Regular maintenance and smart choices can help you avoid costly repairs and ensure a pleasant stay for everyone. This guide will provide you with practical tips and strategies to manage your property effectively.
Key Takeaways
Identify areas that get a lot of foot traffic to focus your maintenance efforts.
Use strong materials and set clear house rules to prevent damage.
Schedule regular deep cleans to keep your cottage fresh and welcoming.
Know when to fix things yourself and when to call in a professional.
Communicate clearly with guests about care instructions and damage deposits.
Understanding Common Wear and Tear Issues
Identifying High-Traffic Areas
In any holiday cottage, certain areas see more foot traffic than others. Identifying these high-traffic zones is crucial for effective wear and tear management. Common high-traffic areas include:
Hallways
Living rooms
Kitchens
Bathrooms
Recognising Signs of Damage
It's important to regularly check for signs of damage. Look out for:
Cracks in walls or ceilings
Worn-out flooring
Faded paint or wallpaper
Loose fixtures
Assessing Seasonal Impact
Different seasons can affect your property in various ways. For instance:
Winter can lead to dampness and cold drafts.
Summer may cause sun damage to furniture and paint.
Spring is a good time for deep cleaning and repairs.
Season
Common Issues
Suggested Actions
Winter
Dampness, cold drafts
Insulate and check for leaks
Spring
Dirt buildup, wear
Deep clean and inspect
Summer
Sun damage, fading
Use protective covers
Regular checks and maintenance can prevent larger issues from developing, ensuring a safe and pleasant stay for your guests.
By understanding these common wear and tear issues, you can better prepare your Cornish holiday cottage for visitors, ensuring it remains a welcoming space throughout the year.
Implementing Preventative Measures
Choosing Durable Materials
When selecting materials for your holiday cottage, opt for those that can withstand heavy use. Durable materials not only last longer but also reduce the frequency of repairs. Consider the following:
Flooring: Use tiles or laminate instead of carpet in high-traffic areas.
Furniture: Choose sturdy, easy-to-clean options.
Paint: Select washable paint for walls to make cleaning easier.
Setting House Rules
Establishing clear house rules can help manage wear and tear. Here are some suggestions:
No shoes indoors to protect flooring.
Limit the number of guests to prevent overcrowding.
Encourage guests to report any issues immediately.
Regular Maintenance Tips
Regular checks can prevent small issues from becoming major problems. Consider these maintenance tasks:
Smoke alarms: Test monthly and replace batteries annually.
Carbon monoxide alarms: Ensure they are installed in rooms with gas appliances.
Risk assessments: Conduct these at least once a year to identify potential hazards.
Regular maintenance not only keeps your property safe but also ensures a pleasant stay for your guests.
By implementing these preventative measures, you can significantly reduce wear and tear in your Cornish holiday cottage, ensuring it remains a welcoming space for all visitors.
Effective Cleaning Strategies
Using the Right Cleaning Products
Choosing the right cleaning products is essential for maintaining your holiday cottage. Using suitable products can prevent damage to surfaces and furnishings. Here are some tips:
Opt for eco-friendly cleaners to protect the environment.
Ensure that products are safe for all surfaces, especially wood and upholstery.
Keep a stock of basic cleaning supplies, including:
All-purpose cleaner
Mould treatment
Glass cleaner
Scheduling Deep Cleans
Regular deep cleaning is vital to keep your property in top shape. Consider the following:
Schedule deep cleans at least once a season.
Focus on high-traffic areas like the kitchen and living room.
Include tasks such as:
Upholstery cleaning
Drains and septic tanks maintenance
Kitchen upkeep
Addressing Stains and Spills
Quickly addressing stains and spills can prevent long-term damage. Here’s how:
Blot spills immediately with a clean cloth.
Use appropriate stain removers for different materials.
For tough stains, consider professional cleaning services.
Keeping your holiday cottage clean not only enhances guest satisfaction but also prolongs the life of your furnishings and fixtures. Regular maintenance is key to a successful rental property.
Repair and Renovation Tips
When to DIY vs. Hire Professionals
Deciding whether to tackle repairs yourself or hire a professional can be tricky. Here are some points to consider:
Skill Level: Assess your own skills. If you’re not confident, it’s better to hire someone.
Time: DIY can take longer, especially if you’re learning as you go.
Complexity: For complex issues, like electrical or plumbing work, it’s safer to hire a professional.
Cost-Effective Repair Solutions
Finding budget-friendly ways to maintain your property is essential. Here are some tips:
Use Local Materials: Sourcing materials locally can save on shipping costs.
Prioritise Repairs: Focus on high-impact areas first, such as the kitchen and bathroom.
Regular Inspections: Conducting property inspections can help catch issues early, saving money in the long run.
Upgrading High-Wear Areas
Certain areas of your cottage will experience more wear and tear. Consider these upgrades:
Bathroom maintenance: Install durable fixtures that can withstand heavy use.
Flooring: Choose hard-wearing materials like tiles or laminate in high-traffic areas.
Furniture: Opt for sturdy, easy-to-clean furniture that can handle frequent use.
Regular maintenance and timely repairs can significantly extend the life of your property. Investing in quality materials now can save you money later.
By following these renovation tips, you can keep your Cornish holiday cottage in great shape for your guests. Remember, a well-maintained property not only enhances guest satisfaction but also protects your investment.
Managing Guest Expectations
Communicating Care Instructions
To ensure a pleasant stay, it’s essential to clearly communicate care instructions to your guests. This can include:
Guidelines on how to use appliances safely.
Instructions for maintaining cleanliness during their stay.
Information on any specific rules regarding the property.
Providing Essential Supplies
Having the right supplies can greatly improve the guest experience. Consider providing:
Basic cleaning products for guests to use.
Extra towels and bedding for convenience.
A welcome pack with local information and emergency contacts.
Handling Damage Deposits
Managing expectations around damage deposits is crucial. Here’s how to approach it:
Explain the purpose of the deposit clearly in your booking terms.
Outline what constitutes normal wear and tear versus damage.
Ensure guests know how and when they will receive their deposit back.
By setting clear expectations, you can help guests feel more comfortable and secure during their stay. This not only enhances their experience but also protects your property.
In addition, regular room inspections can help identify any issues early, ensuring both guest safety and the upkeep of your holiday rental properties. This proactive approach can lead to a smoother experience for everyone involved.
Seasonal Maintenance Checklist
Preparing for Winter
Inspect heating systems to ensure they are functioning properly.
Check for drafts around windows and doors, and seal any gaps.
Ensure that outdoor pipes are insulated to prevent freezing.
Spring Cleaning Essentials
Deep clean carpets and upholstery to remove winter grime.
Inspect the roof for any damage from winter storms.
Clear gutters and downspouts to prevent water damage.
Summer Upkeep Tasks
Conduct outdoor property maintenance such as lawn care and garden upkeep.
Check for any signs of wear in high-traffic areas, especially in the living area.
Regular checks and maintenance are essential to keep your holiday cottage in top shape and ensure a safe environment for guests. A well-maintained property not only enhances guest satisfaction but also protects your investment.
Utilising Local Resources
Finding Reliable Tradespeople
When managing a holiday cottage, it’s essential to have access to trustworthy tradespeople. Here are some ways to find them:
Ask for recommendations from other local cottage owners.
Check online reviews on local business directories.
Visit local trade shows to meet professionals in person.
Sourcing Quality Materials Locally
Using local suppliers not only supports the community but can also save you money. Consider these options:
Local hardware stores often have competitive prices.
Building supply companies can provide bulk discounts.
Farmers’ markets may offer unique materials for renovations.
Engaging with the Community
Building relationships within the community can be beneficial. Here are some ideas:
Join local groups or forums for holiday let owners.
Attend community events to network with locals.
Participate in local initiatives to promote tourism.
Engaging with your local community can lead to valuable connections and resources. Utilising local resources not only helps in maintaining your property but also fosters a sense of community. By sourcing materials and services locally, you can save money and support the economy. Remember, using the support and advice of a holiday let management company can make all the difference to saving money and reducing your holiday costs.
Leveraging Technology for Maintenance
In today’s world, technology can play a big role in keeping your holiday cottage in top shape. Using the right tools can save time and effort. Here are some ways to make the most of technology:
Using Maintenance Apps
Track repairs: Use apps to log maintenance tasks and keep track of what needs fixing.
Schedule reminders: Set up alerts for regular checks and maintenance tasks.
Document issues: Take photos and notes of problems to share with professionals if needed.
Automating Routine Tasks
Smart thermostats: Control heating remotely to save energy.
Automated lighting: Set timers for lights to enhance security.
Smart locks: Allow guests to enter without physical keys, making check-ins easier.
Monitoring Property Conditions Remotely
Security cameras: Keep an eye on your property from anywhere.
Leak detectors: Get alerts for water leaks to prevent damage.
Temperature sensors: Monitor conditions to avoid issues like frozen pipes.
Technology can help you manage your property more effectively, ensuring a better experience for your guests.
By embracing these tools, you can maintain your Cornish holiday cottage efficiently and keep it welcoming for visitors.
Using technology can make maintenance tasks easier and more efficient. By embracing digital tools, you can keep track of repairs and schedules, ensuring everything runs smoothly. If you're looking for skilled tradesmen in Cornwall to help with your maintenance needs, visit our website today!
Conclusion
In summary, managing wear and tear in your Cornish holiday cottage is vital for keeping it in great shape and ensuring guests have a pleasant stay. Regular checks and maintenance can help spot issues before they become big problems. By being proactive, you can save money and keep your property appealing. Remember, a well-maintained cottage not only attracts more visitors but also creates a welcoming atmosphere. So, take the time to care for your property, and it will reward you with happy guests and good reviews.
Frequently Asked Questions
Can I still use my cottage during school holidays?
Yes, you can! We ask owners to limit their stays to six pre-booked weeks each year, including one week in July or August. If the cottage is free seven days before your arrival, you can book it for additional last-minute stays.
How do I book my stays?
You can book your stays through your owner account, which works well with our booking system.
What happens if guests have issues during their stay?
Our team is here to help! We check in with guests to make sure everything is fine and resolve any problems quickly.
Is there a damage deposit for guests?
Yes, most properties have a damage deposit between £250 and £500, and larger ones may go up to £1000. Guests can choose between a deposit or a non-refundable waiver.
Do I have to use your property management service if I already have a housekeeper?
No, you don’t have to use our service if you have your own housekeeper. However, we can assist you if needed.
What if my boiler breaks down?
It's a good idea to have cover for your heating system. We work with companies like Blue Flame and British Gas to offer great packages.
As the tourist season approaches, ensuring that your holiday home is in excellent condition is crucial for a successful rental experience. This article outlines essential repairs and maintenance tasks that will help you prepare your property for guests, ensuring their comfort and safety while protecting your investment.
Key Takeaways
Regularly check the roof for common issues like leaks and damages.
Inspect plumbing systems for leaks and ensure pipes are winterised.
Ensure electrical systems meet safety standards and are up to date.
Refresh interior and exterior paint with weather-resistant options.
Enhance security measures by installing modern locks and alarms.
Inspecting and Repairing the Roof
Identifying Common Roof Issues
Regular inspections are crucial for maintaining the integrity of your roof. Look for signs of damage such as cracked shingles, missing tiles, or sagging areas. These issues can lead to leaks and further damage if not addressed promptly. Key areas to check include:
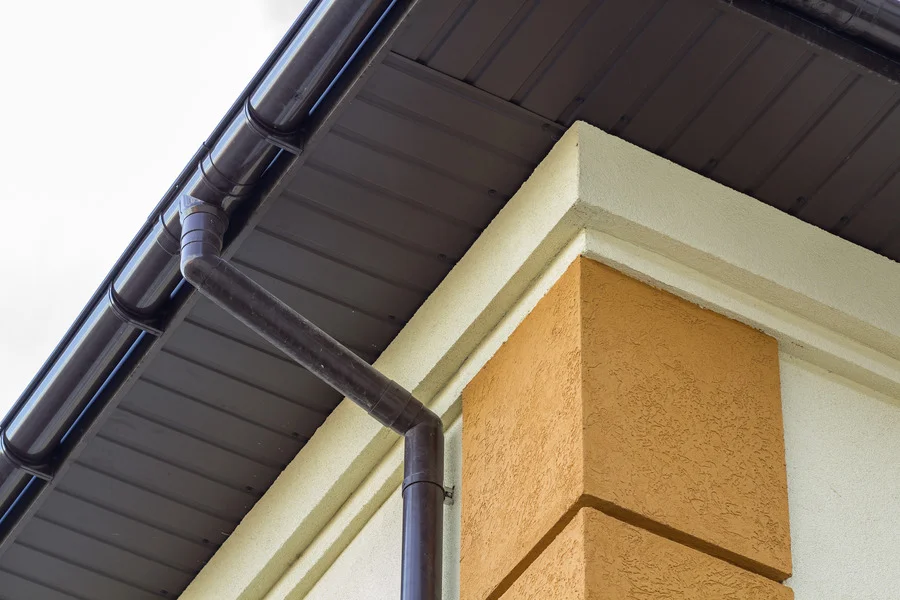
Roof eaves
Flashing around chimneys and vents
Gutters and underlayment
Repairing Leaks and Damages
If you discover any leaks or damages, it’s essential to act quickly. Here are steps to follow:
Identify the source of the leak.
Replace any damaged shingles or tiles.
Seal any gaps with appropriate roofing sealant.
Consider hiring a professional if the damage is extensive.
Choosing the Right Roofing Materials
Selecting the right materials can significantly impact the longevity of your roof. Consider the following options:
Asphalt shingles: Affordable and easy to install.
Metal roofing: Durable and energy-efficient.
Slate tiles: Long-lasting but more expensive.
Regular maintenance can prevent costly repairs and ensure the roof's longevity, especially in challenging weather conditions.
By following these guidelines, you can keep your roof in good condition and ready for the tourist season. Remember, proactive maintenance is key to avoiding major issues down the line.
Maintaining Plumbing Systems
Checking for Leaks and Blockages
Regular checks for leaks and blockages are essential for maintaining a healthy plumbing system. Identifying issues early can save you money and hassle. Here are some key steps to follow:
Inspect all visible pipes for signs of leaks.
Check under sinks and around toilets for dampness.
Use a plunger or drain snake to clear minor blockages.
Upgrading Fixtures and Fittings
Upgrading your plumbing fixtures can improve efficiency and reduce water waste. Consider the following:
Replace old taps with modern, water-saving models.
Install low-flow showerheads to conserve water.
Ensure all fittings are secure to prevent leaks.
Winterising Pipes for Cold Weather
As temperatures drop, it’s crucial to protect your plumbing from freezing. Here are some tips:
If you have an irrigation system, ensure it's properly drained and winterised to avoid damage.
Keep the heating on low in unoccupied properties to prevent freezing.
Regular maintenance is key to ensuring your plumbing system remains functional and efficient. A well-maintained system contributes to overall home hygiene and comfort for your guests.
By following this property upkeep checklist, you can ensure your plumbing is in top shape before the tourist season begins.
Ensuring Electrical Safety
Inspecting Wiring and Outlets
Before the tourist season begins, it’s crucial to check all wiring and outlets in your holiday home. Look for signs of wear, such as frayed wires or scorch marks. Regular safety inspections can help prevent electrical hazards. Here are some key points to consider:
Ensure all outlets are functioning properly.
Replace any damaged or outdated wiring.
Use a qualified electrician for any major repairs.
Upgrading to Modern Electrical Standards
Upgrading your electrical system to meet modern standards is essential for safety. This includes:
Installing circuit breakers instead of fuses.
Ensuring that all electrical work complies with local regulations.
Considering energy-efficient appliances to reduce fire risk.
Installing Safety Devices
Adding safety devices can significantly enhance the safety of your property. Consider the following:
Smoke and carbon monoxide detectors should be installed in key areas.
Use surge protectors to safeguard appliances from power surges.
Regularly test all safety devices to ensure they are operational.
Keeping your holiday home safe is not just about compliance; it’s about ensuring a secure environment for your guests. Regular checks and updates can prevent accidents and enhance rental property safety.
Holiday Decor Safety
When decorating for the holidays, ensure that all electrical decorations are safe to use. Opt for LED lights, which are more energy-efficient and reduce fire risk. Always keep decorations away from heat sources to prevent hazards.
Gas Safety Checks
If your property uses gas appliances, ensure they are regularly checked by a qualified professional. This is vital for preventing gas leaks and ensuring the safety of your guests.
Fire Risk Assessment
Conduct a fire risk assessment to identify potential hazards in your holiday home. This includes checking for flammable materials and ensuring that escape routes are clear.
Kitchen Appliance Testing
Before the season starts, test all kitchen appliances to ensure they are functioning correctly. This includes checking ovens, stoves, and refrigerators to prevent any malfunctions during peak usage times.
By following these guidelines, you can ensure that your holiday home is safe and welcoming for all guests, providing peace of mind during the busy tourist season.
Refreshing Interior and Exterior Paint
Choosing Weather-Resistant Paints
When selecting paint for your holiday home, opt for weather-resistant options. This ensures that the exterior can withstand harsh conditions, keeping your property looking fresh. Consider the following:
Acrylic paints: Great for exteriors due to their durability.
Oil-based paints: Ideal for wood surfaces, providing a smooth finish.
Eco-friendly options: Better for the environment and your guests' health.
Preparing Surfaces for Painting
Before applying new paint, it’s crucial to prepare the surfaces properly. Here are the steps to follow:
Clean the area: Remove dirt and dust to ensure good adhesion.
Repair any damage: Fill in cracks and holes to create a smooth surface.
Sand the surfaces: This helps the paint stick better.
Hiring Professional Painters
If you’re not confident in your painting skills, hiring professionals can save you time and ensure a high-quality finish. Here are some benefits:
Expertise: Professionals know the best techniques and materials.
Efficiency: They can complete the job faster than DIY efforts.
Quality assurance: A professional finish can enhance the overall appeal of your holiday home.
Remember, a well-painted home not only looks good but also contributes to a cosy atmosphere creation for your guests.
For a comprehensive approach, consider adding a holiday home maintenance checklist 2024 to your preparations, covering everything from decluttering to testing electrical devices. This will help keep your holiday home in great condition all year round.
Landscaping and Garden Maintenance
Maintaining the garden is essential for holiday home preparation. A well-kept garden not only enhances the property’s appeal but also provides a pleasant environment for guests. Here are some key tasks to consider:
Pruning Trees and Shrubs
Regularly trim trees and shrubs to promote healthy growth.
Remove any dead or diseased branches to prevent further issues.
Ensure that plants are not obstructing pathways or views.
Maintaining Lawns and Flower Beds
Mow the lawn regularly to keep it neat and tidy.
Encourage the plants you have to work harder for you by regular deadheading and feeding – roses, perennials, bedding and annuals.
Apply mulch to flower beds to retain moisture and suppress weeds.
Installing Irrigation Systems
Consider installing a drip irrigation system for efficient watering.
Regularly check for leaks or blockages in the system.
Set a schedule for watering to ensure plants receive adequate moisture.
A well-maintained garden can significantly improve the overall experience for guests, making it a vital part of holiday rental maintenance.
By focusing on these areas, property management can ensure that the outdoor space is inviting and functional, contributing to a positive stay for visitors.
Updating Security Measures
Installing Modern Locks and Alarms
To ensure home security checks are effective, it’s crucial to install modern locks and alarms. Here are some key points to consider:
Upgrade locks on all doors and windows to high-security options.
Install a reliable alarm system that alerts you and authorities in case of a break-in.
Consider smart locks that can be controlled remotely for added convenience.
Using Smart Home Technology
Smart home devices can significantly improve your property’s security. Here’s how:
Cameras: Install cameras to monitor your property remotely.
Motion sensors: Use sensors to detect movement around your home.
Smart lighting: Set up lights that can be programmed to turn on and off, giving the appearance that someone is home.
Securing Windows and Doors
Regular checks on windows and doors are essential for guest room readiness. Follow these steps:
Inspect all locks and hinges for wear and tear.
Ensure that all windows close securely and are fitted with locks.
Reinforce sliding doors with additional security measures.
Regular risk assessment updates can help identify potential security weaknesses in your holiday home. Keeping your property secure not only protects your investment but also enhances the guest experience by ensuring their safety during their stay.
Cleaning and Repairing Gutters
Removing Debris and Blockages
Keeping your gutters clear is essential for preventing water damage. Regularly check for leaves, twigs, and other debris that can block the flow of rainwater. Here are some steps to follow:
Use a sturdy ladder to access the gutters safely.
Wear gloves to protect your hands from sharp objects.
Remove debris by hand or with a scoop.
Flush the gutters with water to ensure they are clear.
Repairing Damaged Sections
If you notice any leaks or damage in your gutters, it’s important to address these issues promptly. Here’s how:
Inspect for cracks or holes in the gutter material.
Use a sealant to patch small holes.
For larger damages, consider replacing the affected section.
Ensure all joints are tightly sealed to prevent leaks.
Installing Gutter Guards
To reduce the frequency of cleaning, consider installing gutter guards. These can help keep debris out while allowing water to flow freely. Benefits include:
Less frequent cleaning required.
Protection against pests and birds.
Extended lifespan of your gutters.
Keeping your gutters in good condition is vital for the overall health of your holiday home. Regular maintenance can save you from costly repairs in the future.
By following these steps, you can ensure that your gutters are functioning properly, which is crucial for holiday home cleaning and maintaining a safe outdoor area. Don't forget to check your gutters regularly, especially before the tourist season begins!
Keeping your gutters clean and in good shape is essential for your home. Regular maintenance can prevent water damage and save you money in the long run. If you need help with cleaning or fixing your gutters, visit our website to find trusted local tradesmen ready to assist you!
Final Thoughts
In conclusion, preparing your holiday home for the tourist season is crucial for ensuring a safe and enjoyable stay for your guests. Regular checks and maintenance can help prevent costly repairs and keep your property in great shape. From inspecting for leaks and securing outdoor furniture to ensuring proper safety measures are in place, every little detail counts. Remember to keep your property well-lit and free from hazards, and always have an emergency kit ready. By taking these steps, you not only protect your investment but also enhance the experience for your visitors, making their holiday memorable.
Frequently Asked Questions
What should I check first when preparing my holiday home for guests?
Start by inspecting the roof for any leaks or damage, as this can lead to bigger problems later on.
How can I ensure the plumbing is in good condition?
Check all taps, showers, and appliances for leaks. It's also wise to winterise pipes if you're in a cold area.
What electrical safety checks should I perform?
Look at the wiring and outlets for any issues. Upgrading to modern standards can help keep your property safe.
How do I choose the right paint for my holiday home?
Select weather-resistant paints that can withstand the elements. Proper surface preparation is key to a good finish.
What landscaping tasks should I focus on before the tourist season?
Prune trees and shrubs, maintain the lawn, and consider installing an irrigation system to keep everything looking nice.
How can I improve security for my holiday home?
Install modern locks, alarms, and consider smart home technology to monitor your property remotely.
Installing outdoor security lights can greatly enhance the safety and charm of your home. This guide will help you understand how to choose, plan, and install these lights effectively, ensuring your property is well-lit and secure. Whether you're looking to deter burglars or simply brighten up your garden, this DIY project is straightforward and rewarding.
Key Takeaways
Select outdoor lights that are weatherproof and designed for your specific needs.
Plan the installation carefully, considering the best locations for effective lighting.
Always ensure safety by turning off the power before starting any electrical work.
Follow the manufacturer's instructions closely for proper installation and connection.
Regularly maintain your lights to ensure they function correctly and efficiently.
Choosing the Right Security Lights
When it comes to enhancing your home’s safety, choosing the right security lights is crucial. There are various types of security lights available, each with unique features that cater to different needs.
Types of Security Lights
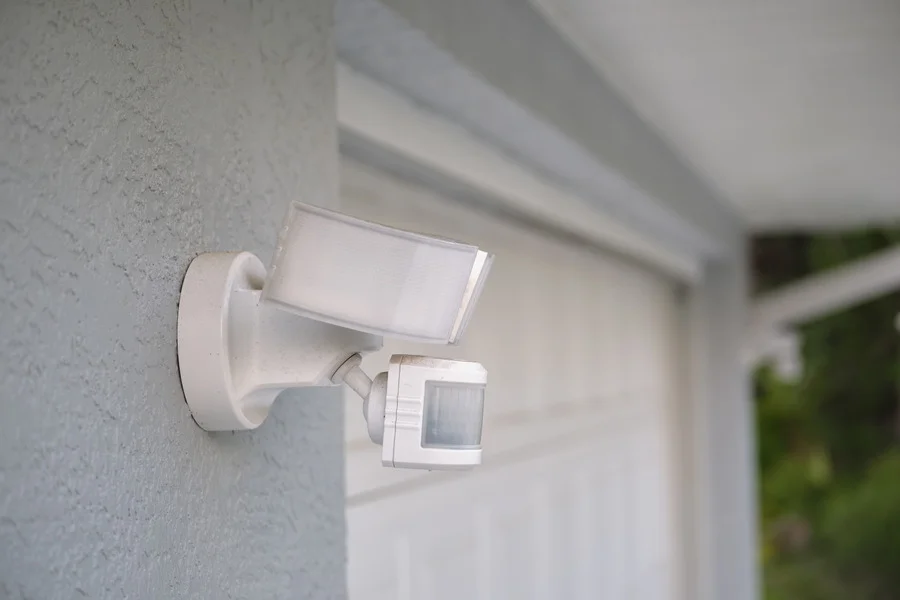
Motion Sensor Lights: These lights activate when they detect movement, making them ideal for driveways and pathways. They not only welcome guests but also deter unwanted visitors.
Dusk to Dawn Lights: These lights automatically turn on at sunset and off at sunrise, ensuring your property is always illuminated during the night.
Timer-Controlled Lights: If you prefer manual control, timer lights can be set to turn on and off at specific times, providing flexibility.
Factors to Consider
When selecting security lights, consider the following:
Brightness: Ensure the lights provide adequate illumination for your property.
Coverage Area: Choose lights that cover the necessary areas without leaving dark spots.
Durability: Opt for weatherproof fixtures that can withstand outdoor conditions.
Energy Efficiency and Cost
To save on energy bills, look for lights with energy-efficient bulbs. Here’s a quick comparison:
Type of Light
Energy Efficiency
Average Cost
Motion Sensor
High
£30 - £100
Dusk to Dawn
Moderate
£25 - £80
Timer-Controlled
Low
£20 - £60
Choosing the right security lights not only enhances your home’s safety but also contributes to energy savings. Always prioritise illumination in your selection process!
Planning the Installation
Planning is a vital step in your DIY projects for outdoor security lights. Here’s how to get started:
Assessing Your Property
Identify areas that need lighting, such as pathways or entrances.
Consider the building regulations in your area to ensure compliance.
Check for existing power sources; if none are available, you may need to install outdoor-rated outlets.
Determining Light Placement
Choose locations that provide maximum coverage. Good spots include:
Near doors for safety.
Corners of buildings for wider illumination.
Areas where motion detection is most effective.
Mark your chosen spots with tape or a marker to visualise the layout.
Gathering Necessary Tools and Materials
Before you start, make sure you have everything you need:
Step ladder for reaching high places.
Electric drill, wire cutters, and connectors.
Weather-resistant fixtures and suitable bulbs with a high IP rating.
Remember: Proper planning can save you time and effort during installation. Take your time to ensure everything is in place before you begin!
Preparing for Installation
Before you start installing your outdoor security lights, it’s essential to prepare properly. This ensures a smooth and safe installation process.
Ensuring Safety Measures
Always wear protective equipment like gloves and goggles to avoid injuries.
Make sure to turn off the power supply at the fuse box to prevent electric shocks.
Use a socket tester to confirm that there is no power in the area where you will be working.
Turning Off Power
Locate your fuse box and switch off the main power.
Inform anyone in your home that the power is off to avoid accidents.
Double-check with a voltage tester to ensure safety before starting.
Reading the Manufacturer's Instructions
Carefully read the installation guide that comes with your lights. This will provide specific details on how to install your chosen fixtures.
Pay attention to any warnings or special instructions regarding wiring and mounting.
Make sure you understand how to connect the lights to the terminal box safely.
Proper preparation is key to a successful installation. With the right tools and safety measures in place, you can enhance your outdoor space effectively.
Installing the Security Lights
Mounting the Lights
To begin, select a suitable location for your security lights. Ideal spots include corners of buildings or near entryways. Ensure the lights are mounted at least nine feet above the ground for optimal coverage. Here’s a quick checklist for mounting:
Choose a location that illuminates key areas.
Use a marker to mark the spot.
Ensure the surface is sturdy enough to hold the light.
Connecting the Wiring
Next, it’s time to connect the wiring. Follow these steps:
Turn off the power at the circuit breaker to ensure safety.
Use a socket tester to confirm the power is off.
Drill a hole for the wiring, ensuring it’s large enough for the cables.
Run the wiring through the hole to the junction box.
Connect the wires using wire connector nuts and secure them with electrical tape.
Attach the light fixture to the mounting bracket.
Testing the Lights
Once everything is connected, it’s crucial to test your installation:
Turn the power back on at the circuit breaker.
Check if the lights illuminate properly.
If your lights have motion sensors, walk around to ensure they detect movement.
Adjust the angle of the lights for the best coverage.
Remember, proper installation of DIY outdoor lights not only enhances security but also adds to the beauty of your home. Regular checks and maintenance will keep them functioning well for years to come.
Maintaining Your Security Lights
Keeping your security lighting in good shape is essential for effective home security. Regular maintenance ensures that your outdoor lights function properly and last longer. Here are some key areas to focus on:
Regular Cleaning and Inspection
Clean the fixtures regularly to remove dirt and debris that can block light.
Inspect for any signs of wear, such as cracks or rust.
Check the wiring connections to ensure they are secure and free from corrosion.
Replacing Bulbs and Batteries
Replace bulbs as soon as they burn out to maintain visibility.
Consider using energy-efficient options like LEDs to save on costs.
For battery-operated lights, replace batteries at least once a year to ensure they function when needed.
Troubleshooting Common Issues
If your lights are not working, consider the following:
Check if the mains power is on.
Inspect for any loose connections.
Ensure that the light sensor is not obstructed.
Regular maintenance can prevent future issues and save costs.
By following these simple steps, you can ensure that your outdoor lighting remains effective and contributes to your overall home security. Don't forget to prioritise electrical safety when handling any wiring or fixtures!
Improving Security with Additional Features
Improving your outdoor security lights with additional features can significantly boost your home’s safety. Motion sensors are a great addition, as they activate the lights when movement is detected, making them perfect for driveways and pathways. Here are some features to consider:
Using Motion Sensors
Automatic Activation: Lights turn on when they sense movement, deterring intruders.
Energy Saving: They conserve energy by turning off when no motion is detected.
Welcoming Guests: They can also be used to greet visitors without needing to flip a switch.
Integrating with Smart Home Systems
Remote Control: Control your lights from your smartphone or tablet.
Scheduling: Set timers for when you want the lights to turn on or off.
Alerts: Receive notifications if the lights are triggered unexpectedly.
Setting Up Timers and Schedules
Dusk to Dawn: These lights automatically turn off during the day, saving energy.
Adjustable Timers: You can set specific times for the lights to operate, which is useful as seasons change.
Consistent Illumination: Ensure your property is well-lit at all times, enhancing safety.
Adding these features not only improves security but also makes your outdoor space more functional and welcoming.
In addition, consider using a wire detector to ensure safe installation, especially when working with electrical wiring. This will help you avoid any hazards and ensure a smooth setup. By incorporating these features, you can create a safer environment for your home and family.
To increase your security, consider adding extra features that can make a real difference. Whether it's installing better locks or upgrading your alarm system, every step counts. For more tips and to connect with local experts, visit our website today!
Final Thoughts on Installing Outdoor Security Lights
In conclusion, setting up outdoor security lights can significantly enhance the safety of your home. By following the steps outlined in this guide, you can create a well-lit environment that deters unwanted visitors and keeps your family safe. Remember to choose lights that are suitable for outdoor use and ensure all connections are secure and weatherproof. If you ever feel unsure about any part of the installation, don’t hesitate to ask a professional for help. With a little effort, you can enjoy a brighter and safer outdoor space.
Frequently Asked Questions
What types of outdoor security lights are available?
There are several types of outdoor security lights, including floodlights, motion sensor lights, and solar-powered lights. Each type serves different purposes and can enhance security in various ways.
How do I choose the best placement for my security lights?
When deciding where to place your security lights, think about areas that need more light, like entrances, driveways, and dark corners of your garden. This will help improve visibility and safety.
Is it safe to install outdoor lights myself?
Yes, you can install outdoor lights yourself if you follow safety guidelines and instructions. However, if you're unsure about electrical work, it's best to hire a qualified electrician.
How often should I check my outdoor security lights?
It's a good idea to check your outdoor security lights regularly, at least once every few months. This will help you catch any issues like burnt-out bulbs or damage before they become bigger problems.
What should I do if my security lights stop working?
If your security lights stop working, first check the bulbs and connections. If everything looks fine but the lights still don’t work, consider consulting an electrician for further help.
Can I use solar lights for security?
Yes, solar lights can be effective for security. They charge during the day and can provide light at night, making them a convenient and energy-efficient option.
Installing a motion sensor light in your garden can enhance safety and convenience. It lights up automatically when it detects movement, making it easier to navigate your outdoor space at night. This guide will walk you through the steps to select, prepare, install, and maintain your motion sensor light effectively.
Key Takeaways
Choose a motion sensor light that suits your garden's needs.
Always turn off the power before starting installation.
Ensure you have all necessary tools and materials ready.
Adjust the sensor settings for best performance.
Regularly clean and inspect your light to keep it working well.
Choosing the Right Motion Sensor Light
When selecting the perfect motion sensor light for your garden, it’s essential to consider various factors to ensure you make the right choice. Motion sensor lights not only increase security but also improve convenience in outdoor lighting.
Types of Motion Sensor Lights
There are several types of motion sensor lights available:
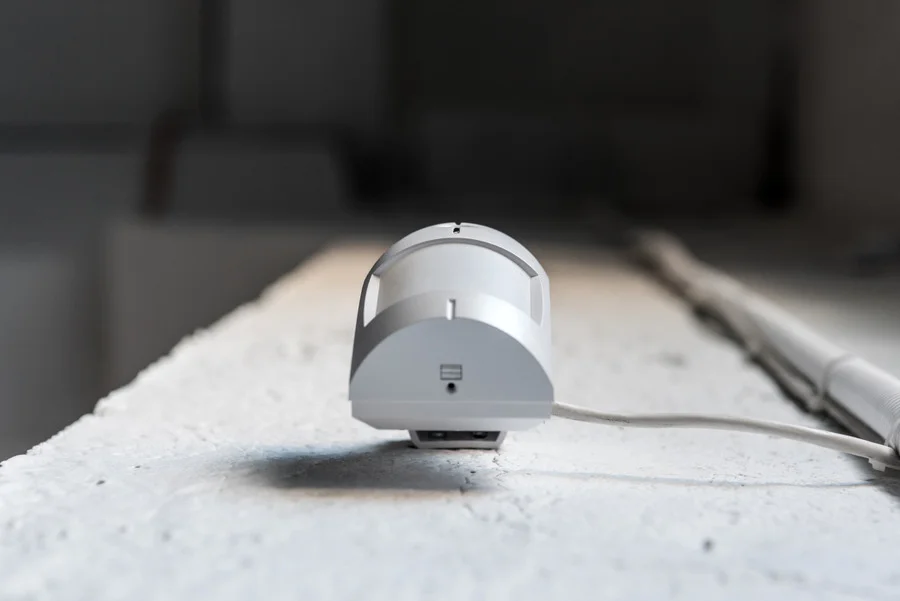
Passive Infrared Sensors (PIR): These detect heat emitted by living beings, making them ideal for most urban settings.
Microwave Sensors: These send out pulses and detect reflections, suitable for rural areas where smaller animals might trigger the light.
Solar-Powered Lights: These are eco-friendly and easy to install, requiring no wiring.
Factors to Consider When Buying
When purchasing a motion sensor light, keep these factors in mind:
Detection Range: Ensure the light has a suitable motion detection range for your garden size.
Light Placement: Positioning is crucial; lights should be mounted high enough to cover a larger area.
Power Source: Decide between battery-powered, wired, or solar options based on your needs.
Feature
PIR Sensors
Microwave Sensors
Solar-Powered Lights
Detection Method
Heat
Reflections
Sunlight
Ideal Location
Urban
Rural
Anywhere
Installation Ease
Moderate
Moderate
Easy
Recommended Brands and Models
Some popular brands to consider include:
Ring: Known for their reliable outdoor lights.
Philips Hue: Offers smart lighting options.
Mr Beams: Great for battery-operated solutions.
Tip: Always check compatibility with your existing light fixtures and ensure they meet your specific needs for motion detection.
By understanding the different types of motion sensor lights and considering the factors mentioned, you can make an informed decision that enhances your garden's security and functionality.
Preparing Your Garden for Installation
Before you start your DIY installation, it’s essential to prepare your garden properly. This ensures that your motion sensor light works effectively and safely.
Selecting the Installation Spot
Choose a location that is free from obstructions like trees or bushes.
Ensure the spot is close to an electrical box for easy wiring connections.
Consider the area you want to illuminate; a well-placed light can enhance security.
Gathering Necessary Tools and Materials
To install your motion sensor light, you will need:
Screwdriver
Wire cutters
Electrical tape
Motion sensor light kit
Safety goggles
Ladder (if needed)
Ensuring Safety Precautions
Safety is paramount when working with electrical wiring. Here are some key precautions:
Always turn off the power at the circuit breaker before starting.
Use tools that are insulated to prevent electrical shocks.
Follow local grounding requirements to ensure safe installation.
Remember, taking the time to prepare your garden and ensuring safety can prevent accidents and make your installation smoother.
By following these steps, you’ll be ready to install your motion sensor light effectively and safely!
Installing the Motion Sensor Light
Mounting the Light Fixture
To start, you need to securely mount the light fixture. Follow these steps:
Turn off the power at the breaker box to ensure safety.
Remove the old light fixture by unscrewing it from the wall.
Attach the new light fixture using the provided bracket, ensuring it is aligned with the electrical box.
Connecting the Wiring
Next, connect the wiring:
Use electrical tape to secure the connections.
Connect the black wire from the light to the black wire in the wall.
Connect the white wire from the light to the white wire in the wall.
Finally, connect the green or bare wire to the ground.
Testing the Motion Sensor
Once everything is connected, it’s time to test:
Turn the power back on at the breaker box.
Walk in front of the sensor to check if the light activates.
If it works, seal the fixture with silicone caulking to protect it from the elements.
Remember, proper installation is key to ensuring your motion sensor light works effectively. A well-installed light can enhance your garden's safety and beauty.
Adjusting the Settings for Optimal Performance
Setting the Detection Range
To ensure your motion sensor light works effectively, adjust the detection range. This helps prevent false triggers from passing cars or moving trees. Here’s how to do it:
Start with the maximum range setting.
Have someone walk towards the sensor from a distance.
Gradually reduce the range until it activates at your desired distance.
Adjusting the Light Duration
You can control how long the light stays on after detecting motion. Most models allow you to set this duration to:
1 minute
5 minutes
20 minutes Choose a setting that suits your needs, ensuring it provides enough time for you to move through the area.
Customising Sensitivity Levels
Adjusting the sensitivity of your motion sensor is crucial for energy efficiency. If it’s too sensitive, it may activate for minor movements like wind-blown leaves. To customise:
Locate the sensitivity dial on the sensor.
Start with a medium setting and test.
Adjust up or down based on your observations.
Remember, the goal is to balance responsiveness with avoiding unnecessary activations. Fine-tuning these sensor adjustments will enhance your experience and improve security in your garden.
Maintaining Your Motion Sensor Light
Regular Cleaning and Inspection
To keep your motion sensor light working well, regularly clean both the bulb and the sensor. Dust and debris can block the sensor, causing it to malfunction. Here are some steps to follow:
Use a soft cloth to wipe the bulb and sensor.
Check for any signs of wear or damage.
Ensure that the area around the light is clear of obstructions.
Troubleshooting Common Issues
If your light isn’t working as expected, you may need to troubleshoot. Here are some common problems:
Nuisance trips: If the light turns on too often, adjust the sensitivity settings.
Circuit breakers: Check if the circuit breaker has tripped.
Lighting controls: Ensure that the light is set to the correct mode.
Replacing Parts When Necessary
Sometimes, parts may need to be replaced. Here’s what to look for:
If the bulb is burnt out, replace it with a new one.
If the sensor is damaged, consider replacing the entire unit.
Always follow electrical safety guidelines when handling electrical components.
Keeping your motion sensor light well-maintained not only enhances its performance but also ensures your garden remains safe and well-lit at night.
Improving Security with Additional Features
Improving your home security can be achieved by integrating additional features into your motion sensor lights. Here are some effective ways to boost safety:
Integrating with Home Security Systems
Connect your motion sensor lights to your existing home security system. This allows for coordinated alerts and monitoring.
Ensure compatibility with your security system for seamless integration.
Consider systems that offer remote access for real-time updates.
Using Smart Home Technology
Smart technology can enhance the functionality of your motion sensor lights. Here are some options:
Voice control through smart assistants like Alexa or Google Assistant.
Remote control via smartphone apps, allowing you to manage lights from anywhere.
Automated schedules to turn lights on and off at specific times.
Adding Multiple Lights for Better Coverage
Installing multiple motion sensor lights can create a more secure environment. Consider the following:
Strategic placement around entry points like doors and windows.
Coverage of dark areas in your garden or yard to deter intruders.
Adjusting sensitivity to ensure lights activate with movement.
By implementing these features, you can create a robust intruder deterrent system that not only lights up your garden but also enhances your overall safety.
Feature
Benefits
Home Security Integration
Coordinated alerts and monitoring
Smart Technology
Remote access and automation
Multiple Lights
Enhanced coverage and visibility
To enhance your security, consider adding extra features that can make a real difference. Whether it's installing better locks or upgrading your alarm system, every step counts. Don't wait—visit our website today to discover how you can improve your safety!
Final Thoughts on Installing Motion Sensor Lights
In conclusion, setting up a motion sensor light in your garden is a straightforward task that can greatly enhance your home’s safety and convenience. By following the steps outlined, you can easily replace an old light with a new motion sensor model. Remember to take your time, ensure all connections are secure, and adjust the settings to suit your needs. With your new light in place, you can enjoy a well-lit garden that responds to movement, making your outdoor space safer and more welcoming.
Frequently Asked Questions
Do I need an electrician to set up a motion sensor light?
It really depends on your situation. Some lights are easy to install by yourself. However, if you're not familiar with outdoor lighting or electrical work, it's best to hire a professional to ensure everything is safe and works well.
How much does it cost to install motion sensor lights?
The cost can vary a lot. If you're doing it yourself, you might spend between £30 and £100 on the light and materials. If you hire someone, it could cost more, depending on the complexity of the installation.
What are the best places to install motion sensor lights?
Good spots include near your front door, back door, garage, or along pathways. These areas will benefit most from the added light when someone approaches.
How do I adjust the settings on my motion sensor light?
Most lights have a dial or switch for adjusting the sensitivity, duration of light, and detection range. Check the instructions that come with your light for specific details.
Can I use motion sensor lights with my home security system?
Yes, many motion sensor lights can be integrated with home security systems. Make sure to check compatibility when you buy your light.
How do I maintain my motion sensor light?
Keep it clean and check it regularly for any damage. If the light stops working, check the bulbs first, and if there's still an issue, refer to the manufacturer's troubleshooting guide.
Fixing a lightbulb that won't turn on can be frustrating, but understanding the common issues and solutions can make the process much easier. Whether it's a simple problem like a burned-out bulb or something more complex, this guide will help you troubleshoot effectively and safely. Here’s what you need to know to get your lamp shining bright again.
Key Takeaways
Always check the power source first; it could be as simple as a tripped circuit breaker.
Inspect the lightbulb for damage; a burned-out bulb is often the main culprit.
Make sure the light switch is functioning properly; a faulty switch can prevent the lamp from turning on.
If the bulb and switch are fine, examine the wiring and socket for any issues.
Consider upgrading to energy-efficient bulbs to reduce future problems and save on electricity.
Understanding the Basics of Lightbulb Mechanics
Types of Lightbulbs and Their Functions
Lightbulbs come in various types, each serving a unique purpose. Here are some common types:
Incandescent Bulbs: Traditional bulbs that produce light by heating a filament.
LED Bulbs: Energy-efficient bulbs that use light-emitting diodes.
CFL Bulbs: Compact fluorescent lamps that are more efficient than incandescent bulbs.
Several factors can lead to a lightbulb not working:
Burnt Out Filament: Common in incandescent bulbs.
Electrical Short: Can cause immediate failure.
Loose Connections: If the bulb isn’t screwed in properly, it won’t make contact.
Safety Precautions Before Starting
Before attempting to fix a lightbulb, always remember:
Turn off the power to avoid electric shocks.
Use insulated tools when working with electrical components.
If unsure, consult a professional.
Always prioritise safety when dealing with electrical devices. A power surge can cause significant damage, so take precautions seriously!
Initial Troubleshooting Steps
Checking the Power Source
Before diving into more complex issues, ensure the power source is functioning. Check if the outlet is working by plugging in another device. If that device doesn’t work either, the problem may lie with the circuit breaker or the outlet itself.
Inspecting the Light Switch
Next, examine the light switch. Look for any signs of damage or wear. If the switch feels loose or doesn’t click properly, it might be faulty. You can test it by turning it on and off several times. If it seems to be the issue, consider replacing it.
Examining the Lightbulb Socket
Finally, check the lightbulb socket. Look for the socket tab; if it’s pressed down too far, it may not make contact with the bulb. You can gently bend it up to ensure a good connection. If the socket appears damaged or if there’s a bad connection, it may need replacing.
By following these initial steps, you can often identify the cause of a lightbulb that won’t turn on. If these checks don’t resolve the issue, further investigation may be necessary.
Advanced Diagnostic Techniques
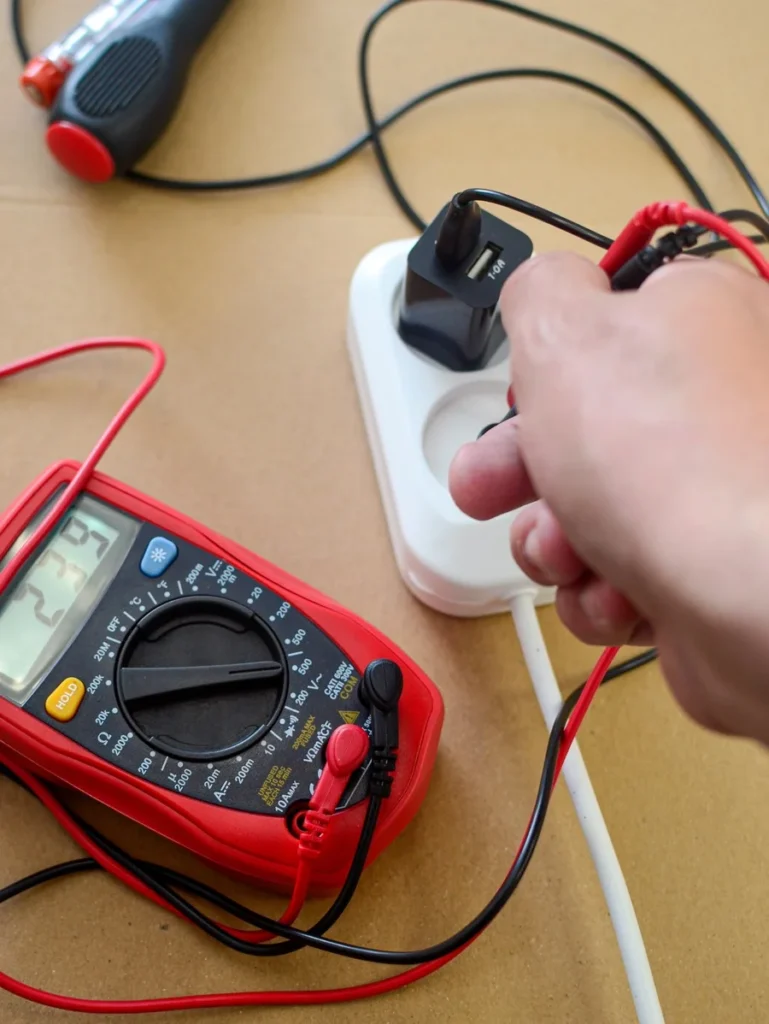
Using a Multimeter to Test Voltage
To check if your lightbulb is getting power, you can use a multimeter. Here’s how:
Turn off the power to the light fixture.
Set the multimeter to the AC voltage setting.
Touch the probes to the socket terminals. If the reading is zero, there’s no power.
Inspecting the Wiring for Damage
Look for any visible signs of damage in the wiring. This can include:
Frayed wires
Burn marks
Loose connections If you find any issues, it’s best to replace the damaged wiring.
Testing the Light Fixture
If the bulb and wiring seem fine, the light fixture itself might be the problem. Here’s what to do:
Remove the lightbulb.
Check the fixture for any signs of wear or damage.
Use a multimeter to test the fixture for power. If there’s no power, the fixture may need replacing.
Remember, safety first! Always turn off the power before working on electrical fixtures. If you’re unsure, it’s wise to consult a professional.
Test
What to Check
Tools Needed
Voltage Test
Power supply to the socket
Multimeter
Wiring Inspection
Damage or wear on wires
Visual inspection
Fixture Test
Power to the light fixture
Multimeter
Replacing the Lightbulb
Choosing the Right Replacement Bulb
When selecting a new bulb, ensure it matches the light fixture specifications. Consider the following:
Wattage: Check the maximum wattage your fixture can handle.
Type: Choose between incandescent, LED, or compact fluorescent bulbs.
Shape: Ensure the bulb fits the socket type, such as E26 or GU10.
Proper Installation Techniques
To install the new bulb safely:
Turn off the power: Always switch off the circuit breaker or unplug the fixture.
Remove the old bulb: Gently twist it counterclockwise until it comes loose.
Insert the new bulb: Align it with the socket and twist it clockwise until secure.
Restore power: Turn the circuit breaker back on or plug the fixture in.
Disposing of the Old Bulb Safely
Old bulbs can be hazardous, especially if they are broken. Follow these steps for safe disposal:
Check local regulations: Some areas have specific rules for disposing of light bulbs.
Use protective gear: Wear gloves and goggles when handling broken bulbs.
Recycle if possible: Many places offer recycling for compact fluorescent bulbs to prevent mercury contamination.
Remember: If the new bulb doesn’t light up, check for issues like a loose socket or faulty wiring. Always ensure that the electrical contact is secure to avoid problems like flickering or a burnt-out bulb.
When to Call a Professional
Identifying Electrical Issues Beyond Your Expertise
If you encounter any of the following signs, it’s time to seek help:
Sparks or burning smells: These are serious indicators of electrical problems.
Frequent circuit breaker trips: This could mean an overloaded circuit.
Flickering lights: This might suggest loose wiring or a faulty connection.
Understanding the Risks of DIY Electrical Work
While many lightbulb issues can be fixed at home, some situations are best left to professionals. Consider the following:
Safety first: Working with electricity can be dangerous.
Potential for further damage: Incorrect repairs can worsen the problem.
Legal implications: Some electrical work requires permits and inspections.
Finding a Qualified Electrician
When you decide to call a professional, ensure you choose wisely. Here are some tips:
Check for licences and insurance.
Read reviews and ask for recommendations.
Get multiple quotes to compare prices.
If you notice sparks or burning, call a qualified electrician immediately. Recent work on walls or ceilings may have loosened or pierced electrical cables. If so, the cables may need to be replaced.
Preventative Measures to Avoid Future Issues
Regular Maintenance Tips
To keep your light fixtures in good shape, consider these simple tips:
Replace light bulbs regularly: Keep track of how long your bulbs last. For example, if a bulb lasts about 1000 hours and you use it for 3 hours a day, change it every year.
Avoid overloading the lamp: Always use bulbs that match the recommended wattage for your lamp. This helps prevent overheating and keeps everything safe.
Protect the cord: Check the cord for any damage like fraying. Make sure it’s not in places where it can be stepped on or tripped over.
Upgrading to Energy-Efficient Bulbs
Switching to energy-efficient bulbs can save you money and reduce light pollution. Dimmers, motion sensors, and timers can help to lower average illumination levels and save even more energy. Consider using:
LED bulbs
CFLs (Compact Fluorescent Lamps)
Smart bulbs that can be controlled remotely
Ensuring Proper Installation and Usage
To avoid future issues, make sure your bulbs are installed correctly:
Check the socket: Ensure the bulb fits snugly in the socket.
Follow instructions: Always read the installation guide that comes with your lamp.
Use the right bulb type: Make sure you’re using the correct type of bulb for your fixture.
Remember, taking safety precautions is key when dealing with electrical items. Regular checks can save you from bigger problems later on!
To prevent future problems, it's essential to take proactive steps today. Regular maintenance and timely repairs can save you from bigger issues down the line. Don't wait until it's too late—visit our website to find skilled tradesmen in Cornwall who can help you keep your home in top shape!
Conclusion
In summary, fixing a lamp that won’t turn on can often be straightforward. Start by checking the power source and ensuring the outlet is functional. If the outlet works, inspect the light bulb for any damage, and replace it if necessary. Next, examine the lamp switch for any faults, and if it’s broken, consider replacing it. If the lamp still doesn’t work, there may be issues with the wiring or the socket, which might require professional help. By following these steps, you can troubleshoot and resolve most common lamp issues, ensuring your space remains well-lit.
Frequently Asked Questions
What should I do if my lamp still doesn’t turn on after checking everything?
If your lamp won’t turn on even after checking the power source, bulb, and switch, it might be time to look at the wiring or call an electrician.
How can I tell if my light bulb is burned out?
You can check if the bulb is burned out by removing it and looking for a broken filament or dark spots inside. If it looks damaged, replace it.
Is it safe to replace a lamp switch myself?
If you have some basic knowledge of wiring, you can replace a lamp switch. However, if you’re unsure, it’s best to hire a professional.
What are the signs of a faulty lamp socket?
Signs of a faulty socket include the bulb not lighting up, visible damage to the socket, or a loose connection when you insert the bulb.
Can I use any type of bulb in my lamp?
No, you should use the type of bulb recommended for your lamp. Check the wattage and type specified on the lamp.
How can I prevent my lamp from having issues in the future?
Regularly check your lamp for loose connections, use the correct bulbs, and avoid overloading the circuit to help prevent future problems.
Keeping your light fixtures clean and well-maintained is important for both safety and aesthetics. This guide offers straightforward steps to help you effectively clean and care for various types of light fixtures, ensuring they shine brightly and last longer.
Key Takeaways
Always turn off the power before cleaning to stay safe.
Use gentle cleaning solutions to avoid damaging fixtures.
Regularly dust and inspect your light fixtures for any issues.
Handle delicate parts with care, especially in chandeliers and pendant lights.
Schedule professional cleaning for intricate fixtures to ensure thorough maintenance.
Understanding Different Types of Light Fixtures
When it comes to light fixtures, there are several types to consider, each serving a unique purpose in your home. Understanding these fixture types can help you choose the right lighting for your space.
Ceiling Lights
Ceiling lights are the most common type of lighting found in homes. They provide general illumination and can come in various styles, including flush mounts and chandeliers. These fixtures are often the main source of light in a room.
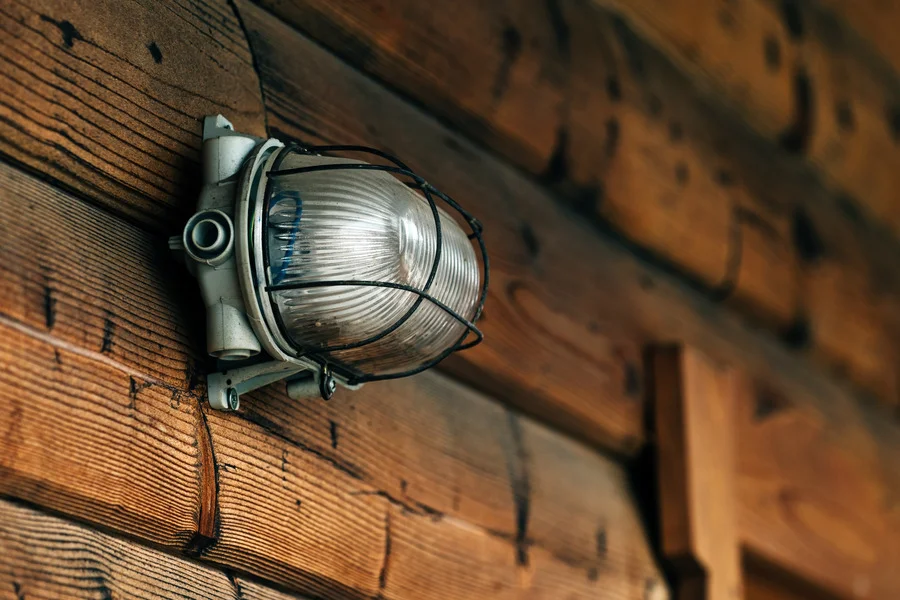
Wall-Mounted Fixtures
Wall-mounted fixtures, such as sconces, are great for adding accent lighting. They can enhance the atmosphere of a room and are often used in hallways or beside mirrors. These fixtures can also help to highlight artwork or architectural features.
Pendant Lights
Pendant lights hang from the ceiling and are perfect for areas like dining rooms or kitchens. They come in various designs and can be used alone or in groups to create a stunning visual effect. Bulb brightness can vary, allowing you to achieve the desired light quality.
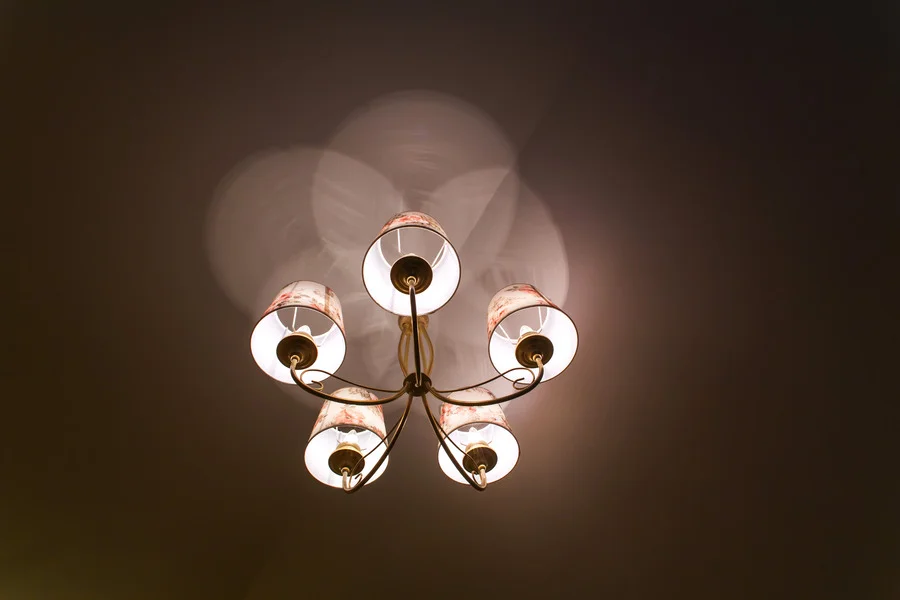
Chandeliers
Chandeliers are decorative fixtures that add elegance to any space. They often feature multiple arms and can be quite elaborate. These fixtures not only provide light but also serve as a statement piece in a room. When cleaning chandeliers, be cautious with recessed lights and delicate parts to avoid damage.
Understanding the different types of light fixtures can help you maintain them better and ensure they provide the right warm glow for your home.
Essential Tools and Materials for Cleaning
When it comes to cleaning light fixtures, having the right tools is essential for achieving a sparkling finish. Here’s a list of the key items you’ll need:
Microfibre Cloths
Microfibre cloths are perfect for dust removal. They trap dust and dirt effectively without scratching surfaces. Always start the cleaning process by using a dry microfibre cloth to eliminate accumulated dust and debris from the fixture.
Mild Detergents
For fixtures that require more than just a dusting, a mild detergent mixed with warm soapy water can be used. Ensure that the detergent is safe for glass to avoid damage. You can also use a solution of distilled white vinegar for a natural cleaning option.
Soft Brushes
A soft brush can help reach tight spots and remove dust from intricate designs. This is especially useful for crystal cleaning in chandeliers or pendant lights.
Protective Gear
Don’t forget to wear gloves and goggles to protect yourself from any cleaning solutions and dust.
Tip: Always test any cleaning solution on a small, inconspicuous area first to ensure it won’t damage the fixture.
By gathering these essential tools, you’ll be well-prepared to tackle the cleaning of your light fixtures effectively and safely!
Step-by-Step Guide to Cleaning Ceiling Lights
Cleaning ceiling lights can be a bit tricky, especially since they are often high up and hard to reach. Here’s a simple guide to help you through the process:
Safety Precautions
Turn off the power to the light fixture to avoid any risk of electric shock.
Use a stable ladder or step stool to reach the fixture safely.
Ensure the bulbs are cool before you start cleaning to prevent burns.
Removing Dust and Debris
Start by gently dusting the fixture with a microfibre cloth to remove any loose dirt.
For grimy bulbs, use a damp cloth to wipe them down carefully.
If your fixture has covers, remove them and soak them in warm, soapy water for a thorough clean.
Cleaning Light Covers
After soaking, scrub the covers gently with a soft brush to remove any stubborn stains.
Rinse them well and dry completely before reattaching.
Don’t forget to clean the housings where the bulbs sit, as they can collect dust too.
Reassembling the Fixture
Once everything is clean and dry, carefully reassemble the fixture.
Make sure all parts are securely in place before turning the power back on.
Finally, step back and admire your sparkling clean ceiling lights!
Keeping your light fixtures clean not only enhances their appearance but also improves the quality of light in your home. Regular maintenance can prevent the build-up of grime and ensure your fixtures shine bright!
By following these steps, you can ensure that your ceiling lights remain in great condition and continue to illuminate your space beautifully.
Maintaining Wall-Mounted Fixtures
Regular Dusting
To keep your wall-mounted fixtures looking their best, regular dusting is essential. Use a soft cloth or a microfiber duster to gently remove dust and dirt. This simple step can significantly enhance your home ambiance.
Deep Cleaning Techniques
For a more thorough clean, follow these steps:
Turn off the power to avoid any electrical hazards.
Use a mild detergent mixed with warm water to wipe down the fixture.
For intricate designs, consider using a soft brush to reach tight spots.
Inspecting for Damage
Regularly check your fixtures for any signs of wear or damage. Look for:
Loose bulbs
Cracks in the fixture
Signs of corrosion
Replacing Bulbs
Ensure that you replace any burnt-out bulbs promptly. Using the right bulbs not only improves lighting but also contributes to fixture care and home aesthetics. Always opt for energy-efficient options to improve your home improvement efforts.
Keeping your wall-mounted fixtures clean and well-maintained not only extends their lifespan but also ensures they continue to add beauty to your space. Remember, electrical safety is paramount when performing any maintenance tasks!
Caring for Pendant Lights and Chandeliers
Dusting and Polishing
To keep your chandeliers and pendant lights looking their best, regular dusting is essential. Here are some tips:
Use a soft, dry cloth or a microfiber duster to gently remove dust.
For shiny finishes, consider using a glass cleaner that is safe for delicate surfaces.
Avoid using abrasive materials that could scratch the shine finishes.
Cleaning Crystal Elements
When it comes to cleaning crystal elements, follow these steps:
Turn off the power to the fixture to ensure safety.
Carefully remove the crystals, taking pictures to remember their arrangement.
Soak the crystals in a mixture of one part vinegar to three parts water, then rinse and dry them thoroughly.
Wipe down the fixture itself with a damp cloth to remove any dust.
Handling Delicate Parts
When cleaning delicate parts of your light fixtures, keep these points in mind:
Always handle with care to avoid breaking or damaging components.
Use gloves to prevent fingerprints on shiny surfaces.
If you need to disassemble parts, keep them organised to make reassembly easier.
Reassembling with Care
After cleaning, reassemble your pendant lights and chandeliers carefully:
Refer to the pictures you took earlier to ensure everything goes back in the right place.
Make sure all connections are secure to avoid any electrical issues.
Finally, turn the power back on and enjoy the renewed shine of your fixtures!
Remember, regular maintenance not only keeps your lights looking great but also extends their lifespan. Safety first: always ensure the power is off before starting any cleaning task!
Preventative Maintenance Tips
Regular Inspection
Inspect your light fixtures regularly for any signs of wear or damage. This helps catch issues early.
Check for dust buildup that can affect performance.
Ensure all bulbs are functioning properly and replace any that are burned out.
Using the Right Bulbs
Always use bulbs that are compatible with your fixtures to avoid overheating.
Consider energy-efficient options to save on electricity bills.
Keep fixtures away from areas prone to moisture, like bathrooms or kitchens.
Use protective covers in damp areas to prevent damage.
Regularly check for any signs of moisture that could lead to electrical issues.
Keeping your light fixtures clean and well-maintained not only enhances their appearance but also ensures safety precautions are met, reducing the risk of accidents.
Scheduling Professional Cleaning
Consider hiring professionals for deep cleaning, especially for intricate fixtures like chandeliers.
Schedule cleanings at least once a year to maintain optimal performance.
Professional services can help with routine maintenance that you might overlook.
By following these tips, you can extend the life of your light fixtures and keep your home safe and bright!
To keep your home in top shape, regular maintenance is key. Simple tasks like checking your smoke alarms, cleaning gutters, and inspecting your roof can save you from bigger problems later. For more helpful tips and to find skilled tradesmen in Cornwall, visit our website today!
Final Thoughts on Light Fixture Care
In conclusion, keeping your light fixtures clean is essential for both their appearance and functionality. Regular cleaning not only helps your lights shine brighter but also ensures a safer environment in your home. By following the simple steps outlined in this guide, you can easily maintain your fixtures and extend their lifespan. Remember to always prioritise safety by turning off the power before you start cleaning. With a little effort, you can enjoy a well-lit and inviting space that enhances your home's charm.
Frequently Asked Questions
How often should I clean my light fixtures?
It's a good idea to clean your light fixtures every few months to keep them looking bright and shiny.
What tools do I need to clean light fixtures?
You will need soft cloths, mild soap, and possibly a vacuum for fabric or beaded shades.
Is it safe to clean light fixtures myself?
Yes, as long as you turn off the power and follow safety guidelines.
Can I use any cleaner for my light fixtures?
No, avoid harsh chemicals. Use mild soap or glass cleaner instead.
How do I clean delicate fixtures like chandeliers?
Take them apart carefully, clean each piece, and then reassemble them.
What should I do if my light fixture is damaged?
Inspect it closely and consider hiring a professional if you find significant damage.