Changing a fluorescent tube light at home may seem daunting, but with the right steps and tools, it can be a straightforward task. This guide will walk you through the process, ensuring you understand what to do and how to do it safely.
Key Takeaways
- Always switch off the power before starting any work on the light fixture.
- Use a stepladder to safely reach the light if it's high up.
- Handle the fluorescent tube carefully to avoid breakage.
- Ensure the new tube is securely fitted to avoid flickering or failure.
- Dispose of old fluorescent tubes responsibly, considering environmental impacts.

Fluorescent tube lights are a popular choice for many homes and businesses due to their energy-efficient lighting. They come in various types, each suited for different needs. Understanding these types can help you choose the right one for your space.
Remember: Proper lighting for kitchens and workspaces is essential for safety and productivity. Always ensure your fluorescent tube installation is done correctly to avoid issues later on.
Understanding the electrical components of light fixtures and the tube light dimensions can make the process of replacing or installing fluorescent tubes much easier. By being aware of these factors, you can ensure a smooth and safe installation process.
When it comes to changing a fluorescent tube light, having the right tools and materials is essential. Gathering everything you need beforehand will make the process smoother. Here’s what you should consider:
When choosing a replacement tube, keep in mind:
| Type | Length | Wattage |
|---|---|---|
| T8 | 4 ft | 32W |
| T12 | 4 ft | 40W |
| T8 | 3 ft | 25W |
Remember, safety is key! Always ensure the power is off before starting any electrical work.
By preparing these tools and materials in advance, you’ll be ready to tackle the replacement with confidence.
Before you start changing the fluorescent tube light, it’s important to prepare properly. Taking the right steps can ensure your safety and make the process easier. Here’s what you need to do:
Remember, safety first! Always ensure the power is off before starting any electrical work.
By following these steps, you’ll be ready to replace your fluorescent tube light safely and effectively. Make sure to gather all necessary tools before you begin!

Remember, changing light bulbs can be a simple DIY task, but safety should always come first!
Once you have installed the new fluorescent tube, it’s time to restore the power. Make sure everything is secure before flipping the switch back on. This step is crucial to ensure safety and functionality.
After turning the power back on, observe the light closely. Here are some points to consider:
If the light is not functioning as expected, follow these steps:
Remember, if you encounter persistent issues, it may be wise to consult a professional. Safety is paramount, especially when dealing with electrical components. Always prioritise safety when working with lights.
When it comes to proper disposal of fluorescent tubes, it’s important to follow the right steps to ensure safety and environmental care. Here’s how to do it:
Remember, following electrical safety tips during disposal is crucial. Always handle tubes carefully to avoid breakage and potential injury.
When it’s time to get rid of your old fluorescent tube, it’s important to do it safely. These tubes contain materials that can be harmful to the environment if not disposed of properly. Check with your local recycling centre for the best way to recycle them. For more tips on how to handle your waste responsibly, visit our website!
Changing a fluorescent tube light at home is not as hard as it seems. By following the steps carefully, you can do it safely and easily. Remember to always turn off the power before starting, and take your time to avoid any mistakes. If you find it tricky, don’t hesitate to ask for help. With a bit of practise, you’ll be able to replace those lights in no time, keeping your home bright and welcoming.
There are several types of fluorescent tubes, including T5, T8, and T12, which vary in size and energy efficiency.
Common issues include flickering, buzzing sounds, and tubes that do not light up at all.
Always turn off the power before starting. Use a stepladder if needed and handle the tubes carefully.
You typically need a screwdriver, a stepladder, and possibly a voltage tester to ensure safety.
Yes, you can recycle them, but be sure to check local regulations as they contain small amounts of mercury.
If the light flickers, is dim, or does not turn on, it may be time to replace the tube.
Changing a ceiling light fixture can seem daunting, but with the right knowledge and tools, it can be a simple task. This guide will help you understand the steps involved and ensure your safety as you light up your space.
Key Takeaways
- Always turn off the power at the circuit breaker before starting any electrical work.
- Use the right tools, like a voltage tester and wire strippers, to ensure a safe installation.
- Wear protective gear, such as gloves and goggles, to shield yourself from dust and debris.
- If you're unsure about handling electrical wires, don't hesitate to call a professional electrician.
- Make sure to follow local electrical codes and regulations to avoid any legal issues.
When working with electricity, safety is the top priority. Always ensure that the power is turned off before starting any electrical work. This simple step can prevent serious accidents.
Remember, safety is not just about the tools you use; it’s also about the precautions you take. Always double-check your work and ensure that all connections are secure, especially the green wire to the grounding screw. This will help prevent electrical hazards in your home.

Before you start your DIY project, it’s essential to gather all the necessary tools and materials. This preparation will help ensure a smooth and safe installation process.
To change a ceiling light fixture, you will need the following tools:
When selecting a new light fixture, consider:
Ensure your workspace is safe and organised:
Remember, having the right tools ready not only saves time but also helps prevent accidents. Always prioritise safety when working with electricity!
Before you start, always turn off the power at the circuit breaker. This is crucial to avoid any electrical shocks. Use a voltage tester to confirm that the electricity is off. If you’re unsure which circuit controls the light, turn on the fixture and switch off each circuit until the light goes out.
Remember, safety first! If you feel unsure at any point, it’s best to consult a professional electrician.
Before you start, ensure that the existing wiring is in good condition and not too long for your new light fixture. If necessary, use wire cutters to trim the ends and strip about half an inch of insulation off the wires. Connect the wires according to the following:
Make sure all connections are tight and neatly packed into the terminal box before closing it up.
Next, take the mounting bracket that comes with your new light fixture. Use it to mark where to drill holes in the ceiling. If the holes from the old fixture line up, you can use those. Secure the bracket in place with screws.
Once the fixture is mounted, install the LED bulbs or any other type of bulbs you prefer. After everything is in place, turn the power back on at the fuse box. Check to see if the light works correctly. If it doesn’t, double-check your connections.
Remember, safety is key! Always turn off the power before starting any electrical work. If you feel unsure at any point, it’s best to consult a professional.
Following these steps will help you successfully install your new light fixture, whether it’s a chandelier or wall sconces. Keep these lighting tips in mind for a safe and effective installation!
After installing your new light fixture, it’s crucial to inspect the installation thoroughly. Check that all connections are secure and that there are no exposed wires. Ensure that the fixture is firmly attached to the ceiling. Here are some key points to consider:
If your new light fixture isn’t working as expected, don’t panic. Here are some common issues and how to resolve them:
To maintain safety over time, follow these homeowner tips:
Remember, safety tips are essential when working with electricity. Always prioritise your safety and don’t hesitate to seek help if needed!
When changing a ceiling light fixture, it’s crucial to understand the local electrical codes that apply to your area. These codes ensure safety and compliance with regulations.
Always prioritise safety and compliance when working with electrical systems. Understanding local codes can prevent costly mistakes and ensure a safe environment for your home.
By following these guidelines, you can ensure that your new light fixture is installed safely and in accordance with local regulations.
When it comes to electrical work, knowing the local rules and guidelines is essential. These regulations ensure safety and quality in every job. If you're looking for reliable tradesmen who understand these codes, visit our website today!
Changing a ceiling light fixture can seem tricky, but with the right steps, it can be done safely and easily. Always remember to turn off the power before starting, and use a voltage tester to ensure there’s no electricity flowing. If you follow the instructions carefully, you can enjoy your new light without any worries. Don’t hesitate to ask for help if you need it, and if you’re ever unsure, it’s best to call a professional. Stay safe and happy lighting!
Turning off the power prevents electrical shocks while you work on the fixture. It's a crucial safety step.
You will need a ladder, screwdriver, wire strippers, and a voltage tester to ensure safety.
Use a voltage tester to check that there is no current in the wires. If the tester lights up, the power is still on.
If you see any damaged wires, cut off the damaged part and strip the wire to expose fresh wire for a safe connection.
Yes, but only if you feel confident and safe doing it. If you're unsure, it's best to hire a professional.
Double-check your connections and ensure the circuit breaker is on. If it still doesn’t work, consult a professional.
Electricity is an essential part of our daily lives, but it can also be very dangerous if not handled correctly. Many homeowners are tempted to take on DIY electrical projects, especially with so much information available online. This guide is designed to help you understand which electrical tasks are safe to do yourself and which ones should be left to the experts, all while keeping safety and local regulations in mind.
Key Takeaways
- Always turn off the power at the breaker before starting any electrical work.
- Use the right tools and safety gear to protect yourself while working.
- Understand the local electrical codes to ensure your work is compliant.
- Know when to call a professional for complex tasks or if you're unsure about your skills.
- Regularly inspect your home's electrical system to catch potential issues early.
Understanding electrical safety is crucial for any homeowner. Electricity can be dangerous if not handled properly. Here are some key points to remember:
Familiarising yourself with common electrical terms can help you understand your home’s electrical system better. Here are a few:
Electricity in most homes flows through circuits. Here’s a simple breakdown:
Understanding these electrical basics is essential for safe DIY projects. Always prioritise safety and know your limits when working with electricity.
When it comes to DIY electrical repairs, having the right tools is crucial for safety and efficiency. Here’s a look at the essential tools you’ll need:
To protect yourself while working on home repairs, always wear the following:
A multimeter is a versatile tool that can measure voltage, current, and resistance. Here’s how to use it:
Remember, using the right tools not only makes your DIY home projects easier but also ensures your safety. Always prioritise electrical safety gear to avoid accidents.
In summary, having the right tools and safety equipment is essential for any DIY electrical work. This will help you tackle projects confidently and safely, reducing the need to call a professional electrician for simple tasks.

Before starting any electrical project, it’s crucial to assess the scope of work. This means understanding what tasks you want to accomplish. Here are some steps to help you:
A well-thought-out plan is essential for a successful project. Follow these guidelines:
A good plan not only saves time but also helps avoid mistakes that could lead to safety hazards.
Before you begin, it’s important to know the local electrical codes. This ensures your work is safe and compliant. Here’s what to do:
By following these steps, you can effectively plan your electrical project and ensure a safer working environment.
When it comes to handling electrical tasks, safety should always be your top priority. Here are some common electrical tasks that homeowners can perform safely:
Remember, if you encounter any issues or feel unsure, it’s best to consult a professional electrician. They can help ensure compliance with Cornwall's building regulations for electrical work and keep your home safe from potential hazards.
When it comes to electrical problems, knowing the signs can save you time and money. Here are some common issues:
A circuit tester is a handy tool for checking if your outlets are working properly. Here’s how to use it:
Sometimes, DIY fixes aren’t enough. Here are situations where you should seek help:
Remember, safety is paramount. If you’re ever in doubt, it’s best to consult a professional. They can help you avoid costly mistakes and ensure your home is safe.
Troubleshooting electrical problems can be straightforward if you know what to look for. Always prioritise safety and don’t hesitate to call in an expert when needed. This way, you can keep your home safe and functional, especially when it comes to essential devices like smoke detectors and other critical systems.
Keeping your electrical systems in good shape is essential for home safety and efficiency. Regular maintenance can prevent hazards and ensure everything runs smoothly. Here are some key areas to focus on:
Regular maintenance is not just about fixing problems; it’s about preventing them. A proactive approach can save you time and money in the long run.
By following these maintenance tips, you can ensure your home remains a safe and efficient place. Remember, a well-maintained electrical system is key to a secure home environment.

When undertaking electrical work, it’s crucial to understand the legal requirements surrounding permits and inspections. Not all projects require a permit, but many do, especially those that involve significant changes to your home’s electrical system.
Some electrical tasks, such as installing new outlets or upgrading your circuit breaker, may require a permit. Here are some common scenarios:
Always check with your local authority or a registered electrician to confirm whether your project needs a permit. Failure to comply could lead to complications, including the removal of illegal installations.
Once your project is complete, an inspection may be necessary to ensure everything meets safety standards. Here’s what to expect:
To ensure your work complies with regulations, consider the following:
Understanding electrical regulations empowers you to make informed decisions about your home’s electrical safety. By prioritising compliance, you can minimise risks and ensure a safe environment for your family.
When it comes to electrical work, understanding permits and inspections is crucial. These steps ensure that your electrical systems are safe and up to standard. If you're looking for reliable tradesmen in Cornwall to help with your electrical needs, visit our website today!
In conclusion, understanding the basics of electrical safety is crucial for every homeowner. While some tasks can be safely tackled on your own, it’s important to know your limits. Always prioritise safety by turning off the power and using the right tools. If a job feels too complicated or risky, don’t hesitate to call in a professional. By being cautious and informed, you can enjoy the benefits of DIY projects while keeping your home and family safe.
Typical errors include overloading circuits, using the wrong wire size, and not grounding properly.
It's generally recommended to have a professional inspection every ten years or when buying or selling a home.
While it might seem easy to replace a faulty circuit breaker, it's best to consult a qualified electrician for new installations.
Flickering lights might mean there are loose connections or overloaded circuits, so it's wise to have them checked.
Using extension cords for extended periods can be risky. It's better to install permanent outlets.
You should hire a professional for tasks involving new circuits, rewiring your home, or work in high-risk areas like kitchens and bathrooms.
If you think your light switch might be faulty, don't worry! You can carry out a simple test to check its condition. This guide will walk you through the steps needed to safely examine and test your light switch, ensuring that you can troubleshoot the problem without calling in a professional. Remember, safety is key when dealing with electricity, so always take the necessary precautions before starting your work.
Key Takeaways
- Always switch off the power before working on a light switch.
- Use a multimeter to check if the switch is functioning properly.
- Inspect for any visible damage or loose connections.
- Testing for continuity can help determine if the switch needs replacing.
- If unsure, it's best to consult a qualified electrician.
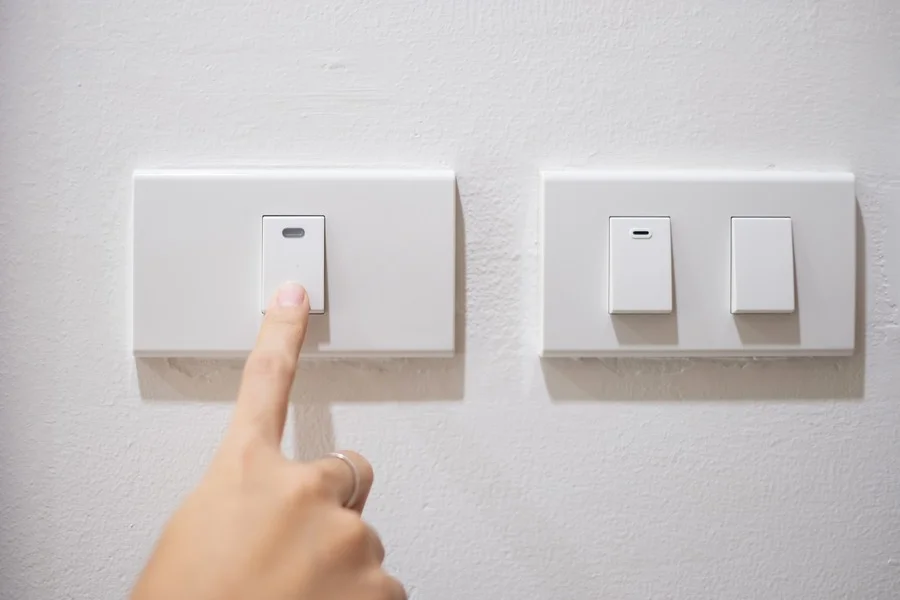
Light switches come in various types, each serving a unique purpose. Here are the most common types:
Light switches can face several problems, including:
Before you start testing a light switch, always remember:
Understanding the basics of light switches is crucial for safe and effective testing. Knowing the types of switches and their common issues can save you time and effort.
When checking if a light switch is faulty, having the right tools is essential. Proper installation and testing can save you time and ensure safety. Here’s what you’ll need:
Remember, using the correct tools not only makes the job easier but also helps prevent accidents. Always prioritise safety when working with electricity!
Before you start testing your light switch, it’s crucial to prepare properly. Safety is the top priority when dealing with electrical components. Here’s how to get ready:
Remember, if you feel unsure about any step, it’s best to consult a professional. Electrical safety is paramount in home maintenance!
Start by examining the light switch for any visible damage. Look for:
Next, check the wiring connections. Ensure:
Finally, assess the overall condition of the switch. Look for:
Safety precautions are essential when inspecting electrical components. Always ensure the power is turned off before starting any inspection to avoid accidents.
By following these steps, you can identify potential issues with your light switch before proceeding to more detailed testing.
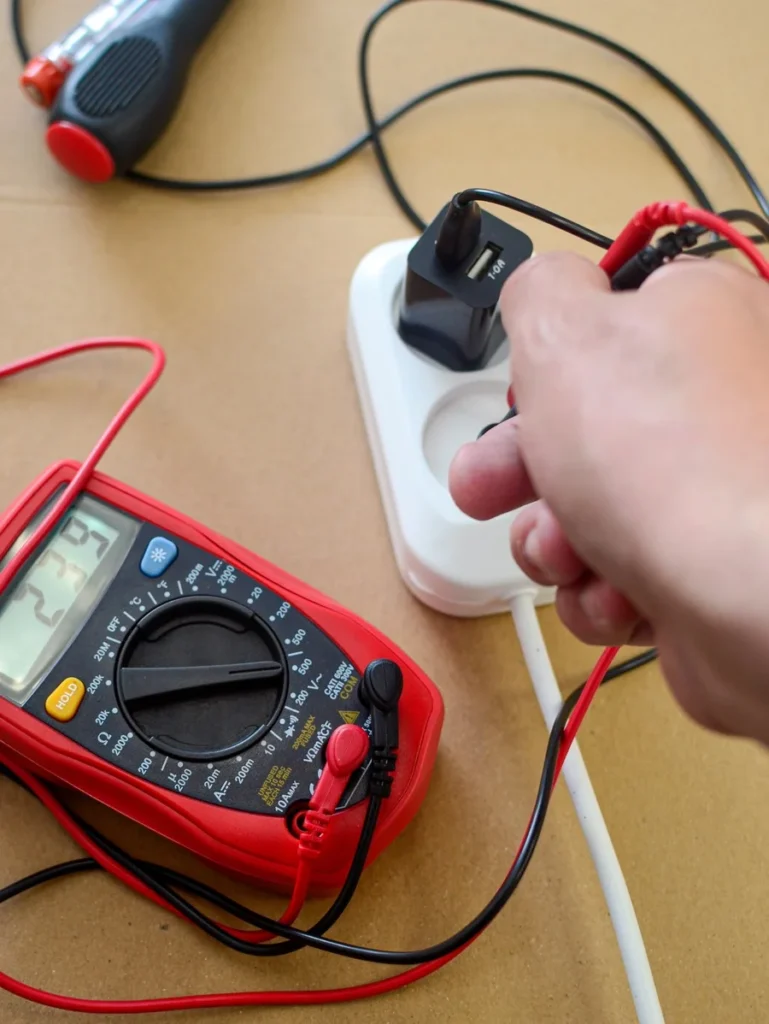
To check if your light switch is working properly, you can use a multimeter. This tool measures resistance and helps you determine if there is a continuous electrical path. Here’s how to do it:
Understanding the results is crucial for troubleshooting:
If your switch fails the continuity test, consider these steps:
Remember, safety first! Always turn off the power before testing any electrical components. If you’re unsure, it’s best to seek help from a qualified electrician.
To begin testing your light switch, you need to set up your voltage tester correctly. Follow these steps:
Once your tester is in place, you can measure the voltage levels:
| Voltage Level | Status |
|---|---|
| 0V | Switch is likely faulty |
| 120V | Switch is functioning |
To ensure you get accurate readings:
Remember: Always prioritise safety when working with electrical systems. If unsure, consult a professional.
By following these steps, you can effectively determine if your light switch is functioning correctly or if it needs replacement. Using a multimeter can provide more detailed insights into the switch's condition.
After ensuring that your light switch is functioning correctly, it’s time to put everything back together. Follow these steps:
Once the switch cover is securely in place, you can restore power:
Now that everything is reassembled, it’s time to test the switch:
Remember: If the light does not work after reassembly, you may need to consider a light switch repair or replacement. It’s crucial to ensure all connections are secure and that the switch is compatible with your lighting setup.
After putting the light switch back together, it's time to test it out. Make sure everything is connected properly and then flip the switch to see if it works. If you need help or want to find a skilled tradesman for your next project, visit our website today!
In conclusion, checking if a light switch is faulty doesn't have to be a daunting task. By following the simple steps outlined in this article, you can safely determine whether your switch is working properly or if it needs replacing. Always remember to turn off the power before you start any testing to keep yourself safe. If you find that the switch is indeed faulty, don't hesitate to reach out to a qualified electrician for help. Keeping your home safe and well-lit is important, and knowing how to troubleshoot your light switches is a valuable skill.
If your light switch is faulty, it's best to call a qualified electrician. They can safely assess the problem and make any necessary repairs or replacements. It's always wise to get professional help when dealing with electrical issues to ensure safety and compliance with standards.
Yes, it's important to test the switch in both positions to get a complete understanding of its functionality. This helps identify any issues that may occur only when the switch is in a particular state.
You can check if your light switch is broken by performing a simple test. If the light doesn’t turn on when the switch is flipped, or if it feels loose or doesn’t click properly, it may need to be replaced.
Yes, but you must take safety precautions. Always turn off the power at the circuit breaker before working on the switch. If you're unsure, it's safer to hire a professional.
To test a light switch, you'll need a multimeter or a continuity tester. A voltage tester is also useful to ensure the power is off before you start.
It's a good idea to check your light switches periodically, especially if you notice any flickering lights or if the switch feels warm. Regular maintenance can help prevent bigger issues.
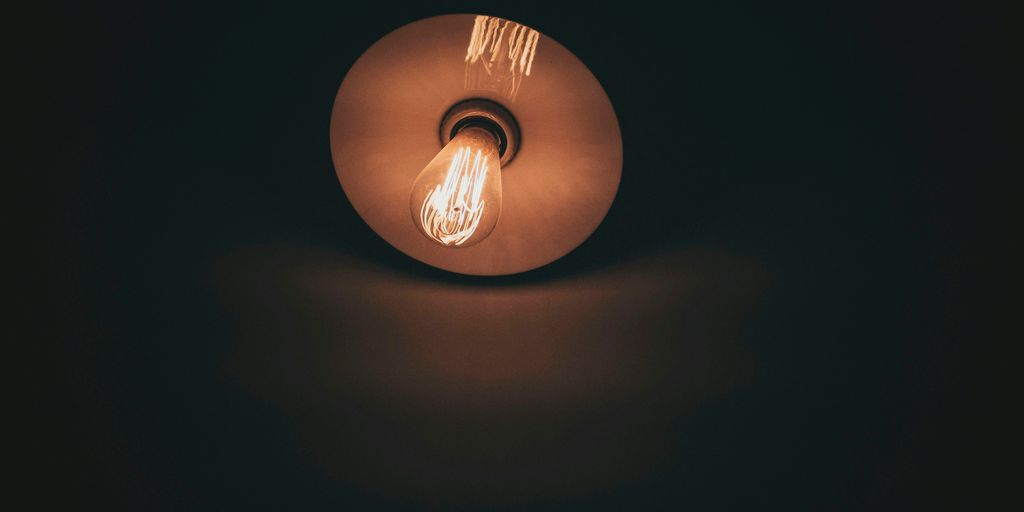
A flickering lightbulb can be more than just an annoyance; it can signal deeper issues with your home’s electrical system. Understanding the common causes of this problem is essential for maintaining safety and comfort in your living space. In this article, we will explore various reasons why lightbulbs flicker and how to effectively address these issues, ensuring your home remains brightly lit and safe.
Key Takeaways
- Tightening a loose lightbulb can often resolve flickering issues.
- Different types of lightbulbs may flicker for various reasons, including compatibility with dimmer switches.
- Electrical problems can escalate; always check for loose connections and faulty wiring.
- Voltage fluctuations can cause lights to flicker; using a multimeter can help diagnose the issue.
- Consulting a professional electrician is advisable if flickering persists to avoid potential hazards.
Flickering lights can be annoying and may indicate a problem. Understanding the reasons behind light bulb flickering is essential for effective troubleshooting. Here are some common causes:
| Lightbulb Type | Common Flickering Causes |
|---|---|
| LED Bulbs | Incompatible dimmer switches |
| Fluorescent Bulbs | Cold temperatures or warming up |
| Incandescent Bulbs | Wrong wattage or overheating |
Regular checks can help prevent flickering lights. Keeping connections tight and ensuring compatibility with dimmer switches can save you from future headaches.
Loose connections can often be the reason behind flickering lights. Tightening connections is a simple first step. Here are some areas to check:
Sometimes, the issue lies within the light switch itself. If you notice flickering:
A faulty circuit breaker can lead to flickering lights. Here’s how to assess it:
Regular electrical inspections can help identify issues before they become serious. Always prioritise electrical safety in your home.
Voltage drops can cause your lights to flicker. Normal voltage levels in a home should be between 115 to 125 volts. If you notice flickering, it might be due to a voltage drop. Here are some signs to look for:
To check if voltage fluctuations are the issue, you can use a multimeter. Follow these steps:
If the reading is outside the normal range, you may have a problem.
If you find that voltage fluctuations are causing your lights to flicker, consider these solutions:
Regular checks can help prevent flickering lights caused by voltage issues. If problems persist, consult a professional.
In summary, addressing voltage fluctuations is crucial for maintaining a stable lighting environment. If you suspect issues, take action to ensure your home’s electrical system is safe and effective. Remember, voltage drop and power surges can lead to flickering lights, so it's important to monitor your electrical supply closely.

When selecting a new lightbulb, consider the following:
To install a new lightbulb correctly:
Dispose of old lightbulbs responsibly:
Remember: A flickering light can often be fixed by simply replacing the bulb. If flickering persists, check for faulty wiring or a faulty light fixture.
If your lights keep flickering after trying simple fixes, it might be time to call in a professional. Here are some signs that indicate you should seek help:
When you hire an electrician, they will:
The cost of hiring an electrician can vary. Here are some factors that can affect the price:
| Service Type | Estimated Cost |
|---|---|
| Basic Inspection | £50 - £100 |
| Wiring Repairs | £100 - £300 |
| Circuit Breaker Replacement | £150 - £400 |
Remember: Ignoring flickering lights can lead to serious issues, including fire hazards from wiring. Always prioritise safety and consult a professional if you're unsure.
Keeping your electrical system in good shape can help prevent flickering lights. Regular checks and upgrades can save you from bigger issues later on.
| Action | Frequency |
|---|---|
| Check lightbulb fittings | Monthly |
| Inspect fixtures | Every 6 months |
| Replace surge protectors | Annually |
To keep flickering lights at bay, it’s essential to take some simple steps. Regularly check your light bulbs and connections to ensure everything is in good shape. If you notice any issues, don’t hesitate to reach out for help. For more tips and to find skilled tradesmen in your area, visit our website today!
In summary, dealing with a flickering light bulb can often be straightforward. Many times, simply tightening the bulb can resolve the issue. However, if the flickering persists, it may point to more serious problems such as loose wiring or faulty fixtures. It's essential to address these issues promptly, as they can pose safety risks. If you're unsure or unable to fix the problem yourself, don't hesitate to call a qualified electrician. Keeping your home safe and well-lit is important, and taking the right steps can help ensure that.
Lightbulbs can flicker due to loose connections, faulty switches, or issues with the light fixture itself. Sometimes, it can also be caused by voltage fluctuations.
Start by turning off the light and tightening the bulb. Then check the connections in the socket and any switches. If the problem persists, it might be time to call an electrician.
If flickering is frequent or accompanied by buzzing sounds, it may indicate a serious electrical issue. It's best to consult a professional in such cases.
Yes, using a bulb that isn't compatible with your fixture or dimmer switch can lead to flickering. Always ensure that the bulb matches the fixture's requirements.
No, ignoring a flickering light can be dangerous as it may signal underlying electrical problems that could lead to fire hazards.
It's a good idea to inspect your light fixtures and bulbs regularly, especially if you notice flickering or other unusual behaviour.
Choosing the right colour temperature for your LED lightbulbs can greatly influence the atmosphere of your home or workspace. With so many options available, understanding colour temperature is essential for creating the ideal environment for various activities. This guide will help you navigate the different colour temperatures and how they can affect mood and productivity.
Colour temperature refers to the appearance of light emitted by a bulb, measured in Kelvin (K). It helps us understand whether the light is warm or cool. For example, a candle emits a warm light at about 2000K, while daylight is around 6000K. This scale helps in choosing the right lightbulb for each room in your home.
Colour temperature is measured using the Kelvin scale. Here’s a simple breakdown:
| Colour Temperature (K) | Description |
|---|---|
| 1000K | Very Red |
| 2700K | Warm White |
| 4000K | Cool White |
| 6000K | Daylight |
| 10000K | Blue Sky |
The Kelvin scale ranges from warm to cool light. Warm light (lower Kelvin) is often used in living spaces for a cosy feel, while cool light (higher Kelvin) is ideal for workspaces. Here are some common types:
Understanding colour temperature is essential for creating the right atmosphere in your home. It can significantly influence your mood and productivity, making it a key factor in lighting design.

Choosing between warm and cool light can greatly affect how we feel and work. Warm light is often more relaxing, making it perfect for spaces where you unwind, like living rooms and bedrooms. In contrast, cool light is energising and helps with focus, making it ideal for workspaces and kitchens.
Here’s a quick guide to the best colour temperatures for various activities:
| Activity | Ideal Colour Temperature |
|---|---|
| Relaxation | 2700K - 3000K |
| Cooking | 4000K |
| Office Work | 5000K |
Light plays a crucial role in regulating our sleep-wake cycle. Exposure to cool light during the day can help keep us alert, while warm light benefits our relaxation in the evening.
The right lighting can significantly influence your mood and productivity.
In summary, understanding the impact of colour temperature can help you create the perfect atmosphere for any room. By choosing the right light, you can enhance your mood and productivity effectively.
Remember: Lighting for relaxation is just as important as lighting for tasks!

Selecting the right colour temperature for each room can greatly influence the atmosphere and functionality of your home. A room-by-room lighting guide can help you make the best choices.
For living rooms, a warm light (around 2700K) is ideal. This creates a cosy and inviting atmosphere, perfect for relaxation and socialising.
In bedrooms, it’s best to stick with warm white bulbs (2700K). This helps maintain a calm environment, promoting better sleep. Avoid cool light, as it can disrupt your circadian rhythm.
Kitchens benefit from a mix of warm (3000K) and cool white (4000K) lighting. Warm light is great for dining areas, while cooler light can help you stay alert while cooking.
For bathrooms, cool white (4000K) is recommended. It provides a bright, refreshing feel, making it easier to see while getting ready in the morning.
| Room | Ideal Colour Temperature |
|---|---|
| Living Room | 2700K - Warm White |
| Bedroom | 2700K - Warm White |
| Kitchen | 3000K - Warm White |
| 4000K - Cool White | |
| Bathroom | 4000K - Cool White |
Choosing the right colour temperature can enhance the mood and functionality of your space.
In summary, remember to choose warmer lights for relaxation areas and cooler lights for task-oriented spaces. This balance will help create a comfortable and effective environment throughout your home.
When choosing LED lightbulbs, it's important to consider how colour temperature affects energy consumption. Generally, energy-saving LED lights are more efficient than traditional bulbs. Here’s a quick comparison:
| Colour Temperature | Watts Used | Brightness in Lumens |
|---|---|---|
| Very Warm White (2700K) | 8W | 800 |
| Warm White (3000K) | 9W | 900 |
| Cool White (4000K) | 10W | 1000 |
| Daylight (6000K) | 12W | 1200 |
When selecting the right colour temperature, consider the following:
Choosing the right colour temperature can also have a positive impact on the environment. By using energy-saving LED lights, you reduce your carbon footprint. LED bulbs produce very little heat, making them safer and more efficient compared to incandescent bulbs, which convert most energy into heat. This efficiency not only saves energy but also reduces the need for frequent replacements, leading to less waste.
Selecting the appropriate colour temperature for your lighting can enhance your living space while being mindful of energy consumption and environmental sustainability.
When shopping for LED lightbulbs, always check the packaging. Look for the colour temperature indicated in Kelvin (K). Common options include:
Think about how the light will fit into your home’s style. For example:
If possible, test the lightbulbs in-store. This can help you see how the light interacts with your space. Consider:
Choosing the right LED lightbulb can significantly impact your mood and productivity. Make informed decisions to create the perfect atmosphere in your home.
| Colour Temperature | Description | Best For |
|---|---|---|
| 2700K - 3000K | Soft white light | Living rooms, bedrooms |
| 4000K - 5000K | Cool white LED | Kitchens, bathrooms |
| 5000K - 6500K | Daylight LED | Task lighting, workspaces |

Many people think that a brighter light means a better light. However, brightness is not the same as colour temperature. A bulb can be very bright but still have a warm colour temperature, which may not be suitable for all tasks. It’s important to choose the right colour temperature for the activity you are doing.
Another common belief is that colour temperature has no impact on sleep. In reality, cooler light can interfere with your body’s natural sleep cycle. Warm light is more relaxing and can help you wind down before bed, while cooler light can keep you alert and awake.
Not all LED bulbs are created equal. They come in various colour temperatures, which can affect the mood and functionality of a space. For example, LEDs can mimic the warm glow of traditional halogen bulbs, making them a great choice for living areas. Here’s a quick comparison:
| Colour Temperature | Description | Best For |
|---|---|---|
| 2000K - 3000K | Warm White | Bedrooms, Living Rooms |
| 4000K - 4500K | Cool White | Kitchens, Workspaces |
| 6000K - 6500K | Daylight | Task Lighting, Offices |
Choosing the right colour temperature can significantly enhance the atmosphere of your home. It’s worth taking the time to understand your options!
Many people have misunderstandings about colour temperature. Some think it only affects how bright a light is, while others believe it has no impact on mood. In reality, colour temperature can change the feel of a room and influence how we perceive our surroundings. If you want to learn more about this topic and discover how it can help you, visit our website today!
Choosing the right colour temperature for your LED lightbulbs is essential for creating the perfect atmosphere in your home or workspace. With various options available, from warm to cool light, it’s important to consider how each type affects your mood and the functionality of the space. Warmer lights (2000K-3000K) are great for relaxation areas like bedrooms and living rooms, while cooler lights (4000K and above) are better for workspaces where focus is needed. By understanding the different colour temperatures and their impacts, you can make informed choices that enhance your environment. If you’re unsure, don’t hesitate to reach out for advice on the best options for your needs.
Colour temperature measures how warm or cool a light appears. It's usually given in degrees Kelvin (K). Lower numbers mean warmer light, like candlelight, while higher numbers mean cooler light, similar to daylight.
You can look at the Kelvin rating on the lightbulb packaging. For cosy areas like living rooms, choose bulbs around 2700K to 3000K. For workspaces, bulbs between 4000K and 5000K are better.
Common types include warm white (2000K-3000K), neutral white (4000K-4500K), and daylight (6000K-6500K). Each type creates a different atmosphere.
No, LED bulbs come in various colour temperatures. It's important to check the packaging to know what you're buying.
Yes, warmer lights can make a space feel more inviting and relaxing, while cooler lights can help with focus and concentration.
Absolutely! You can use warm white for general lighting and cool white for task areas, like a kitchen or office.