Replacing a recessed light fixture can seem tricky, but with the right steps and tools, it’s a job you can handle yourself. This guide will walk you through the process, making it easier to brighten up your space and ensure everything works safely.
Key Takeaways
Recessed lights come in various styles and sizes, so choose one that fits your space.
Always turn off the power before starting any electrical work to stay safe.
Inspect the wiring carefully when removing the old fixture to avoid any issues.
Make sure the new fixture is securely fastened to prevent it from falling.
Regular maintenance, like cleaning and checking bulbs, keeps your lights working well.
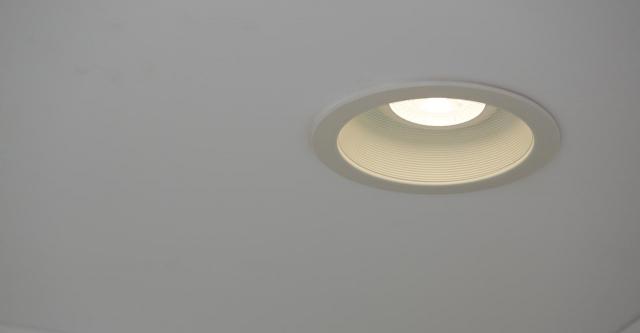
Understanding Recessed Lighting
Recessed lighting is a popular choice for many homes, providing a clean and modern look. These lights are installed into the ceiling, creating a seamless appearance. Here’s a closer look at the different aspects of recessed lighting:
Types of Recessed Lights
Recessed lights come in various styles, including:
New construction: Installed during the building phase.
Retrofit: Added to existing ceilings without major changes.
Decorative trim: Enhances the look of the fixture.
Benefits of Recessed Lighting
There are several advantages to using recessed lights:
Space-saving: They don’t take up room like traditional fixtures.
Versatile: Can be used in any room, including kitchens and living areas.
Energy-efficient: Options like LED recessed lighting save on electricity.
Common Issues with Recessed Lights
While recessed lighting is great, there can be problems:
Flickering lights: Often caused by loose wiring.
Overheating: Can happen if the fixture isn’t properly insulated.
Difficult to replace: Some fixtures may require a conversion kit for upgrades.
Recessed lighting can transform a space, but it’s important to understand the types and benefits before making a decision. Whether you want to replace recessed lighting or upgrade to LED recessed lighting, knowing your options is key.
Gathering Necessary Tools and Materials
When you're ready to replace a recessed light fixture, it's important to have the right tools and materials on hand. Gathering everything you need beforehand will make the process smoother. Here’s what you’ll require:
Essential Tools for the Job
Screwdriver (flathead and Phillips)
Wire cutters/strippers
Voltage tester
Ladder or step stool
Choosing the Right Replacement Fixture
When selecting a new fixture, consider:
Size: Ensure it fits the existing hole.
Style: Match it with your room's decor.
Type of Bulb: Decide between LED, incandescent, or fluorescent options.
Safety Gear and Precautions
Before starting, make sure to wear:
Safety goggles
Gloves
A dust mask
Always remember to turn off the power at the circuit breaker before you begin any electrical work. This will help prevent accidents and ensure your safety.
By preparing with the right tools and materials, you can confidently tackle the task of replacing your recessed light fixture. This preparation is key to a successful installation, especially when replacing recessed fluorescent light fixture with an energy-efficient LED.
Preparing for the Replacement
Turning Off the Power
Before you start, always turn off the power to the light fixture at the circuit breaker. This is crucial for your safety. You can check if the power is off by using a voltage tester.
Removing the Old Fixture
Carefully remove the trim from the old fixture.
Unscrew the fixture from the ceiling.
Disconnect the wires by untwisting the wire nuts.
Inspecting the Wiring
Once the old fixture is out, take a moment to inspect the wiring. Look for any signs of damage or wear. If you see anything unusual, it’s best to consult a professional.
Always ensure that the wiring is in good condition before installing a new fixture. This can prevent future issues and ensure safety.
Installing the New Recessed Light Fixture
Connecting the Wiring
Ensure the power is off before starting any work. This is crucial for your safety.
Connect the wires from the new fixture to the existing wiring. Typically, you will connect:
Black (live) to black
White (neutral) to white
Green or bare (ground) to ground
Use wire nuts to secure the connections and wrap them with electrical tape for extra safety.
Securing the Fixture in Place
Once the wiring is connected, carefully tuck the wires back into the ceiling.
Align the new fixture with the opening and push it into place. Ensure it fits snugly.
Use screws or clips provided with the fixture to secure it firmly.
Testing the New Light
After installation, turn the power back on at the circuit breaker.
Switch on the light to check if it works properly. If it flickers or doesn’t turn on, double-check your connections.
Remember, safety first! Always ensure the power is off before starting any electrical work.
By following these steps, you can successfully replace the light fixture and enjoy your new recessed lighting. If you encounter any issues, refer to a light fixture replacement guide for further assistance.
Troubleshooting Common Problems
When dealing with recessed lighting, you may encounter a few common issues. Here’s how to tackle them effectively:
Dealing with Flickering Lights
Flickering lights can be annoying and may indicate a problem. Here are some steps to resolve this:
Check the bulb: Ensure it is properly fitted.
Inspect the dimmer switch: If you have one, it might not be compatible with your bulb.
Examine the wiring: Loose connections can cause flickering.
Addressing Loose Fixtures
A loose fixture can be both a safety hazard and an eyesore. To fix this:
Turn off the power to the fixture.
Tighten the screws that hold the fixture in place.
Check the mounting bracket to ensure it’s secure.
Ensuring Proper Insulation
Proper insulation is crucial for energy efficiency. Here’s how to check:
Inspect the insulation around the fixture to ensure it’s not blocking airflow.
Use insulation covers if necessary to prevent heat loss.
Consider upgrading to energy-efficient options for better performance.
Remember, safety first! Always turn off the power before attempting any repairs or adjustments.
By following these steps, you can effectively troubleshoot and maintain your recessed lighting, ensuring a well-lit and safe environment.
Maintaining Your Recessed Lighting
Regular Cleaning Tips
To keep your recessed lights looking their best, regular cleaning is essential. Here are some tips:
Dust the fixtures regularly to prevent build-up.
Use a damp cloth to wipe down the surface.
Avoid using harsh chemicals that could damage the finish.
Replacing Bulbs Safely
When it’s time to change the bulbs, follow these steps to do it safely:
Turn off the power to the fixture.
Wait for the bulb to cool down before touching it.
Remove the old bulb carefully and replace it with a new one.
Upgrading to Energy-Efficient Options
Consider switching to energy-efficient bulbs. They last longer and save you money on your electricity bill. Here are some options:
LED bulbs: Use less energy and have a longer lifespan.
CFL bulbs: More efficient than traditional bulbs but take time to warm up.
Halogen bulbs: Offer bright light but consume more energy than LEDs.
Regular maintenance can extend the life of your recessed lighting. Always ensure that connections are secure and check for any signs of wear or damage. If you notice any issues, it’s best to consult a professional.
By following these simple steps, you can keep your recessed lighting in great shape for years to come!
Replacing a recessed light fixture can seem tricky, but with the right tools and steps, it’s quite manageable. Always remember to turn off the power before you start, and take your time to ensure everything is done safely. Once you’ve installed your new fixture, you’ll not only brighten up your space but also feel proud of your handy work. Whether you’re updating an old light or adding a new one, this task can really enhance the look of your home.
Frequently Asked Questions
What is recessed lighting?
Recessed lighting is a type of light that is installed into the ceiling. It creates a clean look since the light fixture is hidden.
How do I know what size recessed light to buy?
To find the right size, measure the hole where the old light was. Most lights come in standard sizes, so it should be easy to find one that fits.
Can I replace a recessed light myself?
Yes, you can replace it yourself if you follow safety steps. Just make sure to turn off the power before you start.
What should I do if the new light doesn’t work?
If the new light doesn’t work, check if the power is on. You might also want to check the wiring to see if it’s connected properly.
How often should I clean my recessed lights?
You should clean your recessed lights every few months. Dust can build up and make them less bright.
Are recessed lights energy-efficient?
Yes, many recessed lights are energy-efficient, especially if you choose LED bulbs. They use less energy and last longer.
Replacing a lightbulb in your microwave might seem daunting, but it's actually a straightforward task. Understanding the steps involved can help you do it safely and effectively. This guide will walk you through the importance of the microwave lightbulb, how to gather the right tools, and the steps to properly replace the bulb.
Key Takeaways
Always unplug the microwave before starting any repairs.
Check the user manual to find the correct type of replacement bulb.
Use the right tools, like a screwdriver, for safe access to the bulb.
Handle the old bulb carefully to avoid any breakage or injury.
Regularly check your microwave lightbulb to ensure it is functioning properly.
Understanding the Importance of the Microwave Lightbulb
Role of the Lightbulb in a Microwave
The lightbulb in your microwave plays a crucial role in monitoring your food as it cooks. While it doesn't contribute to the cooking process itself, it allows you to see inside the microwave, ensuring that your food is heating properly. Without it, you might not notice if something is boiling over or if your food is ready.
Common Signs of a Faulty Lightbulb
If your microwave lightbulb is faulty, you may notice:
The light does not turn on when the door is opened.
The light flickers or dims intermittently.
There is a burnt smell coming from the microwave.
Safety Precautions Before Replacement
Before you attempt to replace the lightbulb, keep these safety tips in mind:
Unplug the microwave to avoid any electrical hazards.
Wait for at least 30 minutes after unplugging to ensure the high-voltage capacitor has discharged.
Wear gloves to protect your hands from sharp edges inside the microwave.
Remember, while replacing a microwave lightbulb is a simple task, safety should always be your top priority. Microwaves are an essential part of our daily kitchen routines, and ensuring they function properly is key to a smooth cooking experience.
Gathering the Necessary Tools and Materials
Essential Tools for the Job
To successfully replace the lightbulb in your microwave, you will need the following tools:
Before starting, ensure you have the correct replacement bulb. Check your microwave’s model to find the right wattage and size. Here’s a quick reference:
Microwave Model
Bulb Type
Wattage
Panasonic
Halogen
20W
Samsung
Incandescent
30W
LG
LED
10W
Safety Gear to Consider
Safety precautions are crucial when working with electrical appliances. Here are some items to consider:
Safety goggles to protect your eyes
Work gloves to avoid cuts from sharp edges
A sturdy mat to sit on while working
Remember: Always unplug the microwave before starting any repairs to avoid electrical shocks. Be cautious of sharp edges when accessing the lightbulb compartment.
Locating the Lightbulb in Your Microwave
Finding the lightbulb in your microwave can be straightforward if you know where to look. Understanding the layout of your microwave is key to accessing the bulb safely and efficiently.
Consulting the User Manual
Always start by checking the user manual for your specific microwave model. It often contains diagrams and instructions on locating the light fixture in microwave.
If you don’t have the manual, you can usually find it online by searching for your microwave model number.
Look for sections that discuss maintenance or bulb replacement.
Common Locations of Microwave Lightbulbs
The lightbulb can be found in various places depending on the design:
Underneath the microwave: Some models have the bulb located at the bottom.
Inside the microwave cavity: Often, it’s positioned on the side or top.
Behind a vent panel: In some cases, you may need to remove a vent panel to access the bulb.
Accessing the Lightbulb Compartment
To access the bulb, follow these steps:
Unplug the microwave to ensure safety.
Locate and remove any screws holding the cover or vent panel in place. For example, you might need to remove the cross point screws from the outer case back. One screw may have a tamper-proof head, so you might need to cut a slot in it and unscrew with a flat-head screwdriver.
Carefully lift off the cover or panel to reveal the lightbulb compartment.
Remember, safety first! Always ensure the microwave is disconnected from power before attempting to access the interior.
By following these steps, you can easily locate the microwave bulb access and prepare for replacement.
Removing the Old Lightbulb
Unplugging the Microwave
Before you start, always unplug the microwave to ensure safety. This prevents any accidental electrical shocks while you work.
Opening the Lightbulb Compartment
To access the light bulb compartment, you will need a Philips head screwdriver. Follow these steps:
Locate the screws that hold the cover in place.
Carefully remove the cover screws using the screwdriver.
Gently lift off the cover to reveal the light bulb.
Safely Extracting the Old Bulb
Once you have access to the bulb, you can remove it:
If the bulb is a standard type, simply unscrew it.
For bulbs with mounting screws, use the screwdriver to remove them.
If the bulb is stuck due to a burnt out bulb, you may need to cut any silicon holding it in place with a utility knife.
Remember to handle the old bulb with care, as it may break easily. Dispose of it properly after removal.
Installing the New Lightbulb
Choosing the Correct Replacement Bulb
When selecting a new bulb, ensure it matches the specifications of your microwave. Using the right type is crucial for proper functioning. Here are some tips:
Check the wattage and type in your user manual.
If unsure, take the old bulb to a store for comparison.
Consider energy-efficient options if available.
Inserting the New Bulb
Carefully position the new bulb into the socket. If it screws in, turn it clockwise until snug.
If your microwave has connector wires, reattach them securely.
Ensure there are no loose parts; everything should fit tightly.
Securing the Lightbulb Compartment
After the bulb is in place, it’s time to close everything up:
Replace any covers or panels you removed earlier.
Use a screwdriver to tighten screws, ensuring everything is secure.
Double-check that no tools or materials are left inside the microwave.
Remember, proper bulb installation is key to ensuring your microwave operates safely and effectively. If the light doesn’t work after installation, revisit your steps to ensure everything is connected correctly.
Testing the New Lightbulb
Plugging in the Microwave
Before you can confirm that the new light bulb is functioning, ensure that the microwave is plugged back in. This is a crucial step to avoid any mishaps during testing.
Running a Test Cycle
Open the microwave door to check if the light turns on. If the bulb is installed correctly, the light should illuminate when the door is opened.
If the light does not come on, try running a short cooking cycle. This can help determine if the light bulb specifications are compatible with your microwave.
Observe if the light activates during the cooking process. If it does, congratulations! You've successfully replaced the bulb.
Troubleshooting Common Issues
If the light does not work, consider the following:
Check the connector for light bulb to ensure it is securely attached.
Verify that you have used the correct light bulb type for your microwave.
Inspect the light socket for any visible damage. If necessary, use a multimeter to test the socket.
If the light still does not function, it may be time to consult a professional. Sometimes, the issue lies beyond just the bulb itself.
Maintaining Your Microwave Lightbulb
Regular Inspection Tips
To keep your microwave lightbulb in good shape, it’s essential to check it regularly. Here are some tips:
Inspect the bulb for any signs of damage or flickering.
Ensure the microwave casing removal is done carefully to avoid any accidents.
Look for any burn marks around the bulb area, which may indicate overheating.
Cleaning the Lightbulb Area
Keeping the lightbulb area clean can help prolong its life. Here’s how:
Unplug the microwave before cleaning.
Use a damp cloth to wipe the area around the bulb.
Avoid using harsh chemicals; instead, opt for mild soap and water.
When to Seek Professional Help
If you notice persistent issues with your microwave lightbulb, it might be time to consult a professional. Consider the following:
If the bulb keeps burning out quickly, it may indicate a deeper issue.
If you’re unsure about changing microwave bulbs, don’t hesitate to ask for help.
Always prioritise safety; if you feel uncomfortable, it’s best to let an expert handle it.
Remember: Regular maintenance can prevent the need for frequent microwave light bulb replacement. Taking care of your appliance can save you time and money in the long run!
Keeping your microwave lightbulb in good shape is essential for a well-functioning kitchen appliance. Regularly check the bulb and replace it when it dims or burns out. For more tips on home maintenance, visit our website and discover how we can help you find skilled tradesmen in Cornwall!
Final Thoughts on Replacing Your Microwave Lightbulb
Changing the lightbulb in your microwave is a straightforward task that you can do yourself. By following the steps outlined in this guide, you can ensure that your microwave remains functional and safe to use. Always remember to unplug the appliance before starting any work, and take care when handling the bulb and its components. If you encounter any issues or feel unsure, don’t hesitate to consult a professional. With a little patience and the right tools, you’ll have your microwave shining bright again in no time!
Frequently Asked Questions
Why is the lightbulb in my microwave important?
The lightbulb helps you see inside the microwave when it's running or when you open the door. It makes cooking easier.
How can I tell if my microwave lightbulb is broken?
If the light doesn't turn on when you open the door or during cooking, it might be burnt out.
What tools do I need to replace the microwave lightbulb?
You typically need a screwdriver and a new lightbulb. It's also good to wear gloves.
Is it safe to replace the lightbulb myself?
Yes, but make sure to unplug the microwave first to avoid any electrical shocks.
What type of lightbulb should I buy for my microwave?
Check your microwave's manual for the correct wattage and type. It’s important to get the right one.
What should I do if the new bulb doesn’t work?
Make sure it’s screwed in tightly. If it still doesn’t work, there might be an issue with the socket or wiring.
Replacing the lightbulb in your oven may seem like a small task, but it plays a crucial role in cooking. The oven light helps you see your food without having to open the door, which can let heat escape. If your oven light is out, don't worry! This guide will walk you through the easy steps to replace it safely and effectively.
Key Takeaways
Always ensure the oven is completely cool before starting the replacement.
Use gloves to protect your hands from sharp edges and to grip the bulb securely.
Locate the lightbulb according to your oven's manual if you're unsure.
Handle the new bulb carefully to avoid damaging it, especially halogen bulbs.
If the new bulb doesn't work, double-check the installation and consider other electrical issues.
Understanding the Importance of Oven Lightbulbs
Why Oven Lightbulbs Are Different
Oven lightbulbs, often referred to as oven lamps, are specially designed to withstand high temperatures. Regular bulbs cannot handle the heat inside an oven, which is why it’s crucial to use the right type. These bulbs are made to endure the heat and provide reliable lighting when you need it most.
Common Types of Oven Lightbulbs
There are mainly two types of oven lightbulbs:
Incandescent Bulbs: Typically 40 watts, these are the most common.
Halogen Bulbs: These can go up to 50 watts and are more energy-efficient.
Type
Wattage
Lifespan
Incandescent
40W
1,000 hours
Halogen
50W
2,000 hours
Safety Precautions When Handling Oven Lightbulbs
When replacing an oven lightbulb, safety is key. Here are some important precautions:
Ensure the oven is cool before starting.
Disconnect the power to avoid any electrical hazards.
Use gloves to prevent oils from your skin damaging the new bulb.
Remember, the lightbulb in your oven is not just for illumination; it helps you monitor your cooking without opening the door, which can affect cooking times and temperatures. Replacing it promptly ensures you maintain visibility while cooking.
Gathering the Necessary Tools and Materials
When it comes to replacing a lightbulb in your oven, having the proper tools for repair is essential. Here’s what you’ll need:
Essential Tools for the Job
Screwdriver (flathead and Phillips)
Pliers
Safety gloves
A clean cloth
Choosing the Right Replacement Bulb
Make sure to select a bulb that is specifically designed for ovens. Here are some common types:
Bulb Type
Wattage
Description
Halogen
40W
Bright light, heat resistant
Incandescent
40W
Standard oven bulb
LED
10W
Energy-efficient option
Additional Materials You Might Need
Replacement bulb
Electrical tape (if needed)
Cleaning solution for the bulb area
Tip: Always ensure that the oven is completely cool before starting the replacement process. This will help prevent any accidents or injuries while you work.
Preparing Your Oven for Lightbulb Replacement
Ensuring the Oven is Cool
Before you start, make sure your oven is completely cool. This is crucial for your safety. If you’ve just finished cooking, wait for the oven to cool down before proceeding.
Disconnecting the Oven from Power
To avoid any electrical hazards, it’s best to disconnect the oven from power. You can do this by unplugging it or turning off the circuit breaker. This step is essential to ensure your safety while working on the oven light replacement.
Locating the Oven Lightbulb
Finding the oven lightbulb can sometimes be tricky. Here are some tips to help you:
Check the user manual for your oven model to find the exact location of the bulb.
Use a flashlight to illuminate the area if it’s hard to see.
The bulb is usually located behind a light box cover that may need to be removed.
Remember, regular checks on your oven light can prevent cooking in the dark. If the bulb is burnt out, replace it immediately to maintain visibility while cooking.
By following these steps, you’ll be well-prepared to replace your oven lightbulb safely and effectively. If you encounter any issues, don’t hesitate to troubleshoot appliance lighting problems before proceeding further.
Removing the Old Lightbulb
Accessing the Lightbulb Cover
To begin, ensure your oven is completely cool. This is crucial for your safety. Next, locate the lightbulb cover, which is usually found at the back or side of the oven. If it’s a glass cover, gently unscrew it by turning it counterclockwise. If there’s a panel, you may need a screwdriver to remove it. Remember to keep the screws in a safe place for later use.
Safely Removing the Lightbulb
Once the cover is off, you can now access the light compartment. Wearing gloves, carefully unscrew the old bulb by turning it counterclockwise. If it’s a push-and-turn type, push it in slightly while turning. Be cautious not to apply too much force, as this could break the bulb.
Inspecting the Lightbulb Socket
After removing the old bulb, take a moment to inspect the socket. Look for any signs of damage or debris. If everything seems fine, you’re ready to proceed with installing the new bulb. If you notice any issues, it might be best to consult a professional before continuing.
Remember, handling lightbulbs can be tricky. Always prioritise safety and take your time during this process!
Installing the New Lightbulb
Handling the New Lightbulb
When you have your new lightbulb ready, make sure to handle it carefully. Use a tissue or cotton gloves to avoid getting oils from your skin on the bulb, which can cause it to burn out faster. Here’s how to proceed:
Check the bulb specifications to ensure it matches your oven’s requirements.
Gently screw the new bulb into the light socket, turning it clockwise until it is secure.
Avoid using excessive force; it should fit snugly without needing to be overly tightened.
Securing the Lightbulb in Place
After installing the new bulb, it’s time to put everything back together:
If your oven has a cover, replace it by turning it clockwise until it’s secure.
Ensure that any screws or clips are properly fastened to hold the cover in place.
Double-check that everything is aligned correctly to prevent any issues later.
Testing the New Lightbulb
Finally, it’s crucial to test the new lightbulb:
Restore power to the oven by plugging it back in or turning on the circuit breaker.
Switch on the oven light to see if it illuminates.
If it doesn’t light up, double-check your installation to ensure everything is connected properly.
Remember, if the lightbulb doesn’t work after installation, it might be a sign of a deeper issue. In that case, consult a professional for help.
Reassembling and Testing Your Oven
Reattaching the Lightbulb Cover
Once you have installed the new lightbulb, it’s time to put everything back together. Make sure the cover is secure to prevent any dust or grease from getting inside. Follow these steps:
Align the cover with the bulb.
Gently screw it back in or clip it into place.
Ensure it’s tight but not overly forceful to avoid breaking it.
Restoring Power to the Oven
After securing the cover, you can reconnect your oven to the power supply. Here’s how:
Plug the oven back into the socket.
If you turned off the circuit breaker, switch it back on.
Double-check that everything is in order before proceeding.
Testing the Oven Light
Finally, it’s time to test your new lightbulb. Here’s what to do:
Turn on the oven light switch.
Observe if the light illuminates.
If it doesn’t work, revisit the previous steps to ensure everything was done correctly.
Remember, proper oven maintenance is key to ensuring your appliance works efficiently. If the light still doesn’t turn on, it might be time to consult a professional for further assistance.
Troubleshooting Common Issues
Lightbulb Does Not Turn On
If your oven light is not illuminating, the first step is to check the power supply. Here are some common reasons:
The bulb may be burnt out.
The oven might not be plugged in properly.
A circuit breaker could have tripped.
Lightbulb Flickers
A flickering lightbulb can be annoying. This issue might be caused by:
If you notice strange smells or sounds when the light is on, it’s important to act quickly. Possible causes include:
Overheating of the bulb.
A loose or broken connection in the wiring to the elements.
Burnt wiring, which can be dangerous.
Always prioritise safety when dealing with electrical issues. If you are unsure, consult a professional.
Issue
Possible Cause
Solution
Light does not turn on
Burnt bulb, unplugged, tripped circuit
Replace bulb, check power
Light flickers
Loose connection, faulty bulb
Tighten or replace bulb
Unusual smells or noises
Overheating, burnt wiring
Turn off oven, seek help
If you're facing issues, don't worry! Many common problems can be easily fixed. For more help and tips, visit our website and discover how we can assist you further. Your next step towards a solution is just a click away!
Final Thoughts on Replacing Your Oven Light Bulb
Changing the light bulb in your oven is a simple task that anyone can do. By following the steps outlined in this guide, you can ensure that your oven is well-lit and ready for cooking. Remember to always prioritise safety by turning off the power and allowing the oven to cool down before starting. If you encounter any difficulties, don’t hesitate to consult your oven’s manual or seek professional help. With a little care, you can keep your oven functioning properly and enjoy cooking with ease.
Frequently Asked Questions
What types of lightbulbs are used in ovens?
Ovens typically use special bulbs that can handle high temperatures. Common types include incandescent and halogen bulbs.
Is it safe to use my oven without a working lightbulb?
Yes, you can still use your oven without a lightbulb, but it will be harder to see what’s cooking inside.
How do I know if the bulb is the problem?
If the oven light doesn't turn on, first check if the oven is plugged in and the circuit breaker is fine. If everything is okay, the bulb might be burnt out.
Can I replace the oven lightbulb myself?
Absolutely! Changing the oven lightbulb is a simple task that most people can do on their own.
How long should an oven lightbulb last?
Typically, an oven lightbulb can last anywhere from 1,000 to 2,000 hours, depending on usage.
What should I do if the new bulb doesn’t work?
If the new bulb doesn’t light up, double-check that it’s installed correctly. If it still doesn’t work, there may be an issue with the socket or wiring.
Choosing the right lightbulb for your home can seem tricky, but understanding energy-efficient options can make the process easier. Energy-efficient lightbulbs not only save you money but also help the environment. This guide will break down the types of energy-efficient lightbulbs available and how to choose the best one for your needs.
Key Takeaways
Energy-efficient bulbs, like LEDs, save money and last longer than traditional bulbs.
Look for lumens to measure brightness instead of watts; higher lumens mean brighter light.
CFLs are cheaper than LEDs but less efficient; LEDs are the best choice for long-term savings.
Check the colour temperature; warmer light is best for homes, while cooler light is ideal for workspaces.
Always check the fitting type to ensure compatibility with your light fixtures.
Understanding Energy Efficiency Ratings
What Energy Efficiency Ratings Mean
Energy efficiency ratings are important indicators that help you understand how much energy a product uses. These ratings can significantly impact your energy bills reduction. They provide a clear picture of how much electricity an appliance consumes and its overall performance.
How Ratings Are Determined
Energy efficiency ratings are determined through standardised tests that measure the energy consumption of various products. These tests consider factors such as:
Energy usage during operation
Lifespan of the product
Environmental impact, including CO2 emissions
Importance of High Ratings
High energy efficiency ratings are crucial for several reasons:
They help you save money on your energy bills.
They contribute to reducing your carbon footprint.
They often indicate better quality and performance of the product.
Choosing products with high energy efficiency ratings can lead to significant savings over time.
Rating
Description
Energy Consumption
A+++
Excellent
Very low
A++
Very Good
Low
A+
Good
Moderate
A
Fair
Higher
B
Poor
High
Understanding these ratings can guide you in making informed choices about your home appliances and energy efficiency ratings, ensuring you select the best options for your needs.
Types of Energy-Efficient Lightbulbs
When it comes to energy-efficient lighting, there are several types of lightbulbs to consider. Each type has its own benefits and uses, making it important to choose the right one for your needs.
LED Bulbs
LED light bulbs are the most popular choice today. They are highly efficient and can last up to 25,000 hours. LEDs use about 75% less energy than traditional bulbs and are available in various shapes and sizes, making them suitable for almost any light fitting. Here are some key points about LED bulbs:
Instant brightness
Available in different colour temperatures
Energy STAR bulbs are a great choice for efficiency
CFL Bulbs
Compact Fluorescent Lamps (CFLs) were among the first energy-saving bulbs on the market. They use about 70-80% less electricity than traditional incandescent bulbs and can last nearly 10 times longer. However, they take a moment to warm up to full brightness. Key features include:
Lower initial cost compared to LEDs
Good for general lighting
Available in various shapes
Halogen Incandescents
Halogen bulbs are a type of incandescent bulb that is slightly more efficient. They provide a bright, white light and are often used in spotlights. However, they are being phased out due to their lower efficiency compared to LEDs. Here are some points to consider:
Shorter lifespan than LEDs and CFLs
Higher energy consumption than LEDs
Still used in specific applications like ovens and security lights
Type of Bulb
Lifespan (hours)
Energy Use (watts)
Brightness (lumens)
LED
25,000
8-15
800 (60W equivalent)
CFL
10,000
13-15
800 (60W equivalent)
Halogen
2,000
40-100
800 (60W equivalent)
Choosing the right type of light bulb can significantly impact your energy bills and environmental footprint. Consider switching to LED vs. halogen for better efficiency and savings.
In summary, when selecting from the types of light bulbs, consider your specific needs, the brightness required, and the energy savings you wish to achieve. Each type has its advantages, so make an informed choice!
Comparing Lightbulb Lifespan and Costs
Initial Costs vs Long-Term Savings
When choosing lightbulbs, it's essential to consider both the initial cost and the long-term savings. Here’s a quick comparison:
Bulb Type
Initial Cost
Lifespan (Hours)
Estimated Annual Cost (based on 3 hours/day)
Incandescent
£1.00
1,000
£30.00
Halogen
£2.00
2,000
£20.00
CFL
£5.00
10,000
£8.00
LED
£10.00
25,000
£3.00
LED bulbs last the longest and save the most money over time.
CFLs are a good middle ground, offering decent lifespan and savings.
Halogen bulbs are cheaper initially but have a shorter lifespan.
Lifespan of Different Bulbs
The lifespan of lightbulbs varies significantly:
Incandescent bulbs: Last about 1,000 hours.
Halogen bulbs: Last around 2,000 hours.
CFL bulbs: Can last up to 10,000 hours.
LED bulbs: Can last up to 25,000 hours, making them the most durable option.
Cost-Effectiveness Analysis
To understand the cost-effectiveness:
Calculate the total cost of ownership, including purchase price and energy costs.
Consider how often you will need to replace the bulbs.
Factor in the energy savings over time, especially with LEDs which consume less power.
Switching to energy-efficient bulbs can significantly lower your electricity bills and reduce your carbon footprint. For instance, if you replace all the bulbs in your home with LEDs, you could save up to £40 a year in Great Britain.
In summary, while LEDs may have a higher upfront cost, their longevity and energy efficiency make them a wise investment for the future. Understanding the light bulb brightness and the Kelvin scale for lightbulbs can also help you choose the right option for your needs.
Choosing the Right Brightness and Colour Temperature
Understanding Lumens and Watts
When selecting lightbulbs, it’s important to know that brightness is measured in lumens. The higher the lumen count, the brighter the bulb will be. Here’s a quick comparison of traditional bulbs and their LED/CFL equivalents:
Traditional Bulb Wattage
Approximate Lumens (LED/CFL)
15 watt
140 lumen
25 watt
250 lumen
40 watt
470 lumen
60 watt
800 lumen
75 watt
1,050 lumen
100 watt
1,520 lumen
Selecting the Right Brightness
To choose the right brightness for your space, consider:
The purpose of the room (e.g., reading, relaxing, working).
The amount of natural light available.
Personal preference for light intensity.
Colour Temperature Options
Colour temperature is measured in Kelvins (K) and affects the mood of a room. Here are some common options:
Warm White (2700K): Ideal for living spaces, creating a cosy atmosphere.
Cool White (4000K): Suitable for workspaces, providing clear visibility.
Daylight (5000K and above): Best for areas needing bright, natural light.
The Colour Rendering Index (CRI) is also crucial. It indicates how accurately a bulb shows colours. A CRI of 80 or more is generally good for home use, ensuring colours appear true to life.
Choosing the right light can significantly enhance your home’s atmosphere and functionality.
By understanding these factors, you can make informed decisions that suit your needs and preferences.
Environmental Impact of Lightbulb Choices
Reducing Carbon Footprint
Switching to energy-efficient lightbulbs can significantly lower your carbon emissions. For instance, if you replace all the bulbs in your home with LED lights, you could cut down your annual carbon dioxide emissions by up to 35kg in Great Britain and 50kg in Northern Ireland. This is crucial as lighting accounts for about 11% of the average UK household's electricity use.
Recycling and Disposal
When it comes to disposing of lightbulbs, it’s important to consider the following:
LEDs and CFLs can often be recycled at local facilities.
Always check local guidelines for proper disposal methods.
Avoid throwing away bulbs in regular trash, especially those containing hazardous materials like mercury.
Sustainable Manufacturing Practises
The production of energy-efficient bulbs is designed to be more sustainable. Here are some key points:
Lower energy consumption during manufacturing.
Use of recyclable materials in bulb design.
Reduction in waste through improved production techniques.
By choosing energy-efficient bulbs, you not only save money but also contribute to a healthier planet. Energy-efficient bulbs help reduce the strain on natural resources and lower overall carbon emissions.
Type of Bulb
Carbon Emissions Reduction
Lifespan
LED
Up to 35kg/year
15,000 hours
CFL
Up to 20kg/year
10,000 hours
Halogen
Up to 10kg/year
2,000 hours
Installation and Compatibility Considerations
Fitting Types and Sizes
When choosing energy-efficient lightbulbs, it’s crucial to ensure compatibility with your existing fixtures. Here are some common fitting types:
If you’re replacing an old bulb, take it with you to the store to find a matching one. If it’s a new fixture, refer to the specifications provided.
Dimmers and Controls
Not all energy-efficient bulbs work with dimmer switches. Here are some tips:
Check Compatibility: Look for bulbs labelled as dimmable.
Upgrade Dimmers: If your dimmer is old, consider upgrading to one that supports LED or CFL bulbs.
Test Before Purchase: If possible, test the bulb in your fixture to ensure it dims properly.
Safety and Compliance
Safety is paramount when installing new lightbulbs. Follow these guidelines:
Read Instructions: Always refer to the manufacturer’s instructions.
Check Voltage: Ensure the bulb matches the voltage of your fixture.
Use Certified Products: Look for bulbs that meet safety standards to avoid hazards.
Choosing the right lightbulb not only saves energy but also enhances the safety and comfort of your home.
In summary, understanding fitting types, ensuring dimmer compatibility, and prioritising safety will help you make the best choice for your lighting needs. Remember, ensure LED lights fit your existing fixtures to avoid any installation issues.
Government Regulations and Incentives
Energy Efficiency Standards
Government policies and incentives play a crucial role in promoting energy efficiency. In the UK, there are strict regulations that set energy efficiency standards for lightbulbs. These standards help ensure that only the most efficient products are available on the market.
Government Incentive Programmes
To encourage the use of energy-efficient lighting, the government offers various schemes. Here are some key incentives:
Rebates for purchasing energy-efficient bulbs.
Tax credits for businesses that upgrade to energy-efficient lighting.
Grants for community projects focused on energy efficiency.
Understanding Energy Labels
When shopping for lightbulbs, it's important to look for energy labels. These labels provide information about the bulb's efficiency and performance. Here’s what to check:
Energy rating (A++ to E).
Lifespan in hours.
Brightness in lumens.
Understanding these labels can help you make informed choices and save money on your energy bills.
By being aware of government regulations and incentives, you can make better decisions when choosing lightbulbs for your home. This not only benefits your wallet but also contributes to a more sustainable environment.
Government rules and incentives play a big role in helping local tradesmen thrive. By understanding these regulations, you can make the most of the support available to you. If you're looking for skilled tradesmen in Cornwall, visit our website today to connect with trusted professionals ready to assist you!
Final Thoughts on Energy-Efficient Lightbulbs
In conclusion, choosing energy-efficient lightbulbs for your home is a smart move. Not only do these bulbs save you money on your electricity bills, but they also help the environment by reducing carbon emissions. By switching to LED or CFL bulbs, you can enjoy bright, warm lighting while using less energy. Remember to check the packaging for important details like lumens and colour temperature to find the best fit for your needs. Making this change is simple and can lead to significant savings over time. So, next time you need a new bulb, opt for an energy-efficient option and light up your home responsibly.
Frequently Asked Questions
What does energy efficiency mean for lightbulbs?
Energy efficiency shows how much light a bulb gives out compared to the energy it uses. Higher efficiency means more light for less energy.
Which lightbulb type lasts the longest?
LED bulbs last the longest, often up to 15 years, while CFLs last around 10 times longer than traditional bulbs.
How can I save money by switching to energy-efficient bulbs?
By changing to LED bulbs, you can save about £40 a year on electricity bills, as they use less energy.
What are lumens and why are they important?
Lumens measure brightness. When choosing a bulb, look for higher lumens for more light, instead of focusing on watts.
Are there any special rules about lightbulb sales?
Yes, some inefficient bulbs like halogens are being phased out, but shops can still sell their remaining stock.
How should I dispose of old lightbulbs?
Many lightbulbs can be recycled, but check local guidelines. CFLs and LEDs require special care due to their materials.
Choosing the right wattage for your lightbulbs is essential for creating the perfect atmosphere in your home while ensuring safety and energy efficiency. This guide will help you understand the basics of wattage and lumens and how to select the best bulbs for your needs.
Key Takeaways
Wattage measures power, but lumens indicate brightness; choose bulbs based on lumens for better results.
Consider the size and purpose of each room when selecting bulb wattage to enhance comfort and functionality.
LED bulbs use less wattage than traditional bulbs while providing the same brightness, making them a smart choice.
Always check the maximum wattage rating of fixtures to avoid overheating and safety hazards.
Specialty bulbs, like smart or dimmable options, can offer added flexibility for your lighting needs.
Understanding Wattage and Lumens
What is Wattage?
Wattage refers to the amount of power a light bulb uses. Each bulb has a specific wattage rating, which is usually printed on the base. Knowing the wattage is crucial because it helps you avoid using a bulb that draws too much power for your fixture.
The Relationship Between Wattage and Lumens
Lumens measure the brightness of a light bulb. Different types of bulbs produce varying amounts of lumens per watt. Here’s a quick comparison:
Bulb Type
Lumens per Watt
Incandescent
14
Halogen
25
CFL
63
LED
74
This means that for the same wattage, an LED bulb will provide more light than an incandescent bulb.
Why Lumens Matter More Than Wattage
When choosing a light bulb, focus on lumens rather than wattage. This is because lumens indicate how bright the light will be, while wattage only tells you how much energy the bulb uses. For example, a 100-watt incandescent bulb gives off about 1600 lumens, while an LED bulb can achieve the same brightness using only 18 watts.
Tip: Always check the lumen output to ensure you get the brightness you need for your space.
In summary, understanding the difference between wattage and lumens can help you make better choices for your lighting needs. Opt for bulbs with a high lumen-to-watt ratio, like LEDs, to save energy and enjoy longer LED lifespan.
Assessing Your Lighting Needs
Evaluating Room Size and Purpose
When choosing the right wattage for your lightbulbs, consider the size and purpose of each room. Larger rooms typically require more light, while smaller spaces can function well with less. Here are some key points to consider:
Living Rooms: Aim for ambient lighting that creates a welcoming atmosphere.
Kitchens: Bright, focused lighting is essential for cooking and food preparation.
Bedrooms: Soft lighting helps create a relaxing environment.
Considering Natural Light
Natural light can significantly affect your lighting needs. Rooms with ample natural light may require less artificial lighting. Here’s how to assess:
Observe how much light enters the room at different times of the day.
Consider using light fittings that complement the natural light.
Adjust your artificial lighting based on the season and time of day.
Determining Desired Ambiance
The ambiance you want to create will influence your choice of bulbs. For example:
Chandelier lighting can add elegance to dining areas.
Smart lighting allows for flexibility in mood settings.
DIY lighting solutions can be tailored to your personal style.
Lighting design is crucial for enhancing your home. The right wattage can transform a space, making it more functional and inviting.
By understanding your lighting needs, you can make informed decisions that enhance your interior lighting and overall home experience.
Energy Efficiency and Cost Considerations
Comparing Incandescent, CFL, and LED Bulbs
When choosing light bulbs, it's essential to understand the differences between incandescent, CFL, and LED bulbs. Here’s a quick comparison:
Bulb Type
Wattage
Lifespan (hours)
Energy Efficiency
Incandescent
60
1,000
Low
CFL
13-15
10,000
Medium
LED
8-12
25,000
High
Incandescent bulbs are the traditional choice but consume more energy.
CFLs are more efficient and last longer than incandescent bulbs.
LEDs are the most energy-efficient option, using significantly less power and lasting much longer.
Calculating Energy Consumption
To understand how much you might spend on lighting, consider the following formula:
Wattage of the bulb (in watts)
Hours used per day
Cost of electricity (per kilowatt-hour)
For example, if you use a 10-watt LED bulb for 5 hours a day:
Switching to energy-efficient bulbs can lead to significant savings on your home energy bills. Here are some benefits:
Lower electricity costs due to reduced wattage.
Fewer replacements needed, especially with LEDs.
Environmental impact is lessened, contributing to a greener planet.
Choosing the right bulbs not only saves money but also helps reduce your carbon footprint.
In summary, when selecting light bulbs, consider their energy efficiency, lifespan, and the impact on your home energy bills. Opting for LEDs or CFLs can lead to substantial savings over time, making them a smart choice for any household.
Choosing the Right Bulb for Each Room
Selecting the right light bulb for each room in your home can greatly enhance your home decor and comfort. Here’s how to choose the best options:
Living Room Lighting
LED light bulbs are ideal for living rooms as they provide bright light without consuming too much energy.
Aim for a warm white light (around 2700K) to create a cosy atmosphere.
Consider using dimmer switches to adjust brightness based on the time of day or activity.
Kitchen and Dining Area Lighting
Use daylight bulbs (5000K-6500K) for task lighting in kitchens to help with cooking and food preparation.
Pendant lights or under-cabinet lighting can enhance functionality and style.
Ensure bulbs are easy to clean and maintain, as kitchens can get greasy.
Bedroom Lighting
Opt for soft, warm light to promote relaxation and sleep.
Use smart home technology to control lighting with your phone or voice.
Consider bedside lamps with adjustable brightness for reading or winding down.
Bathroom Lighting
Bright, white light is essential for grooming tasks. Use bulbs with a higher lumen output.
Install lights around mirrors to avoid shadows.
Ensure that the bulbs are moisture-resistant to prevent damage.
Choosing the right light bulbs can transform your space, making it more inviting and functional. Always consider the specific needs of each room to create the perfect atmosphere.
Room Type
Recommended Bulb Type
Colour Temperature (Kelvin)
Lumen Output
Living Room
LED
2700K
800-1600
Kitchen
Daylight
5000K-6500K
800-1200
Bedroom
LED
2700K
800-1200
Bathroom
LED
4000K
800-1600
Safety and Compatibility
Checking Fixture Specifications
When choosing light bulbs, it’s crucial to check the fixture specifications. Each light fixture has a maximum wattage rating, which indicates the highest wattage bulb it can safely accommodate. Using a bulb with a higher wattage than recommended can lead to overheating and potential fire hazards. Always refer to the label on the fixture or consult the manufacturer’s guidelines.
Understanding Voltage Requirements
Understanding the voltage requirements of your fixtures is also important. Most household fixtures operate on 120 volts, but some may require different voltages. Using a bulb with the wrong voltage can damage the bulb or the fixture itself. Always ensure that the bulb matches the voltage of your fixture to avoid any issues.
Avoiding Overheating Risks
To prevent overheating, consider the following tips:
Use the correct wattage: Stick to the recommended wattage for your fixtures.
Ensure proper ventilation: Make sure fixtures are not covered or enclosed in a way that traps heat.
Always prioritise safety when selecting light bulbs. Using lower wattage bulbs in higher wattage fixtures is generally safe, but it’s essential to ensure compatibility with your fixtures to avoid any risks.
Summary Table of Fixture Ratings
Fixture Type
Maximum Wattage
Recommended Bulb Type
Ceiling Fixture
60W
LED 10W or CFL 13W
Table Lamp
100W
LED 15W or CFL 20W
Wall Sconce
40W
LED 6W or CFL 9W
Specialty Bulbs and Their Uses
Dimmable Bulbs
Dimmable bulbs are a great choice for creating the perfect atmosphere in your home. They allow you to adjust the brightness to suit your mood or activity. Here are some key points about dimmable bulbs:
They can be used in various fixtures, including lamps and ceiling lights.
LED dimmable bulbs are energy-efficient and last longer than traditional options.
Smart Bulbs
Smart bulbs are the future of lighting. They can be controlled remotely using your smartphone or voice commands. Here’s what you should know:
They offer a range of colours and brightness levels.
You can set schedules for when the lights turn on or off.
Many smart bulbs can be integrated with home automation systems.
Outdoor and Security Lighting
When it comes to outdoor lighting, safety and visibility are key. Here are some options:
Frosted bulbs are ideal for soft, diffused light.
Decorative light bulbs can enhance the look of your garden or patio.
Motion-sensor lights provide security and convenience.
Choosing the right specialty bulb can improve your home’s atmosphere and improve energy efficiency. Consider your needs and preferences before making a decision.
Bulb Type
Key Features
Dimmable Bulbs
Adjustable brightness, energy-efficient
Smart Bulbs
Remote control, colour options
Outdoor Lighting
Frosted bulbs, motion sensors
Specialty bulbs are unique light sources that serve various purposes, from enhancing the beauty of your garden to providing specific lighting for your home. Whether you're looking to brighten up a room or create a warm atmosphere outdoors, these bulbs can make a big difference. Explore our website to discover the perfect specialty bulbs for your needs!
Final Thoughts on Choosing the Right Wattage
In conclusion, selecting the correct wattage for your light bulbs is essential for both safety and comfort in your home. Always check the maximum wattage allowed for your fixtures to avoid any risks of overheating or fire. Remember, higher wattage doesn't always mean brighter light; it's about finding the right balance for each room's needs. Opting for energy-efficient options like LED bulbs can save you money and provide the brightness you desire. So, take your time to choose wisely, and enjoy a well-lit, safe environment.
Frequently Asked Questions
What does wattage mean for light bulbs?
Wattage shows how much power a light bulb uses. Higher wattage usually means more energy consumption.
How do I know what wattage to use?
Check the label on your light fixture. It tells you the maximum wattage allowed for safe use.
Can I use a higher wattage bulb in a lower wattage lamp?
No, using a higher wattage bulb can cause overheating and may lead to fire hazards.
What is the equivalent wattage for LED bulbs compared to incandescent?
For example, a 60-watt incandescent bulb is roughly equal to an 8-10 watt LED bulb.
Why should I choose LED bulbs over traditional ones?
LED bulbs use less energy and last longer, making them more cost-effective in the long run.
How do I choose the right bulb for a specific room?
Think about the room's purpose and size. For example, brighter bulbs are better for workspaces.
Changing a fluorescent tube light at home may seem daunting, but with the right steps and tools, it can be a straightforward task. This guide will walk you through the process, ensuring you understand what to do and how to do it safely.
Key Takeaways
Always switch off the power before starting any work on the light fixture.
Use a stepladder to safely reach the light if it's high up.
Handle the fluorescent tube carefully to avoid breakage.
Ensure the new tube is securely fitted to avoid flickering or failure.
Dispose of old fluorescent tubes responsibly, considering environmental impacts.
Understanding Fluorescent Tube Lights
Fluorescent tube lights are a popular choice for many homes and businesses due to their energy-efficient lighting. They come in various types, each suited for different needs. Understanding these types can help you choose the right one for your space.
Types of Fluorescent Tubes
T8 Tubes: Commonly used in homes and offices, these tubes are 1 inch in diameter.
T5 Tubes: Thinner than T8, these are often used in commercial settings for their efficiency.
T12 Tubes: The older type, now less common due to lower energy efficiency.
Common Issues with Fluorescent Lights
Flickering: Often caused by a faulty starter motor for lights or poor pin alignment in tubes.
Dim Lighting: This can indicate that the tube is nearing the end of its life.
Burnt Out Tubes: Regular checks can help in light fitting maintenance to avoid this issue.
Safety Precautions
Always turn off the power before starting any work on your light fixtures.
Use gloves to handle the tubes to avoid injury from broken glass.
Dispose of old tubes properly, as they contain hazardous materials.
Remember: Proper lighting for kitchens and workspaces is essential for safety and productivity. Always ensure your fluorescent tube installation is done correctly to avoid issues later on.
Understanding the electrical components of light fixtures and the tube light dimensions can make the process of replacing or installing fluorescent tubes much easier. By being aware of these factors, you can ensure a smooth and safe installation process.
Gathering Necessary Tools and Materials
When it comes to changing a fluorescent tube light, having the right tools and materials is essential. Gathering everything you need beforehand will make the process smoother. Here’s what you should consider:
Essential Tools for the Job
Screwdriver: A flathead or Phillips screwdriver, depending on your light fixture.
Ladder: To reach high fixtures safely.
Gloves: To protect your hands while handling the tube.
Selecting the Right Replacement Tube
When choosing a replacement tube, keep in mind:
Length: Common lengths are 4 feet, 3 feet, and 2 feet.
Type: T8 and T12 are the most common types.
Wattage: Ensure the wattage matches your old tube to avoid electrical issues.
Type
Length
Wattage
T8
4 ft
32W
T12
4 ft
40W
T8
3 ft
25W
Additional Materials You Might Need
Electrical tape: For securing connections.
Wire nuts: To safely connect wires.
Replacement light cover: If the old one is damaged.
Remember, safety is key! Always ensure the power is off before starting any electrical work.
By preparing these tools and materials in advance, you’ll be ready to tackle the replacement with confidence.
Preparing for the Replacement
Before you start changing the fluorescent tube light, it’s important to prepare properly. Taking the right steps can ensure your safety and make the process easier. Here’s what you need to do:
Turning Off the Power
Switch off the power at the fuse box to avoid any electrical shocks.
Use a voltage tester to confirm that the power is off at the fixture.
Do not rely solely on the wall switch; always check the fuse box.
Removing the Light Cover
If your fixture has a cover, gently remove it to access the tubes.
Be careful not to break the cover; it may be made of glass or plastic.
Place the cover in a safe spot to avoid damage.
Handling the Old Tube
Carefully remove the old tube by rotating it out of its sockets.
Make sure to support the tube with both hands to prevent it from falling.
If the tube is cracked or broken, wear gloves to protect your hands.
Remember, safety first! Always ensure the power is off before starting any electrical work.
By following these steps, you’ll be ready to replace your fluorescent tube light safely and effectively. Make sure to gather all necessary tools before you begin!
Replacing the Fluorescent Tube Light
Removing the Old Tube
Turn off the power to the light fixture to ensure safety. You can do this at the fuse box, not just the wall switch.
Use a stepladder to reach the light fixture comfortably.
Gently support the fluorescent tube with both hands and rotate it 90 degrees. This will align the prongs for removal.
Carefully pull the tube down and out of the fixture. Make sure to handle it gently to avoid breakage.
Installing the New Tube
Take the new fluorescent tube and align its prongs with the slots in the fixture.
Push the tube straight up into the sockets. Ensure it is locked in place by rotating it 90 degrees until you feel it click.
Give the tube a gentle tug to confirm it is secure.
Ensuring Proper Fit and Function
After installation, turn the power back on and check if the light works.
If the light does not illuminate, you may need to check the light starter replacement or ensure the tube is properly fitted.
For any issues, refer to light bulb troubleshooting guides to resolve common problems.
Remember, changing light bulbs can be a simple DIY task, but safety should always come first!
Testing and Final Adjustments
Turning the Power Back On
Once you have installed the new fluorescent tube, it’s time to restore the power. Make sure everything is secure before flipping the switch back on. This step is crucial to ensure safety and functionality.
Checking for Proper Illumination
After turning the power back on, observe the light closely. Here are some points to consider:
The light should illuminate immediately.
There should be no flickering or dim areas.
If the light does not work, double-check the installation.
Making Necessary Adjustments
If the light is not functioning as expected, follow these steps:
Turn off the power again.
Remove the tube and check for any loose connections.
Reinstall the tube, ensuring it is seated properly.
Turn the power back on to test again.
Remember, if you encounter persistent issues, it may be wise to consult a professional. Safety is paramount, especially when dealing with electrical components. Always prioritise safety when working with lights.
Disposing of the Old Fluorescent Tube
When it comes to proper disposal of fluorescent tubes, it’s important to follow the right steps to ensure safety and environmental care. Here’s how to do it:
Environmental Considerations
Fluorescent tubes contain mercury, which is harmful to the environment.
Improper disposal can lead to pollution and health risks.
Always check local regulations regarding disposal.
Safe Disposal Methods
Do not throw them in regular trash.
Take them to a recycling centre that accepts fluorescent tubes.
Contact local waste management for special disposal events.
Recycling Options
Many hardware stores offer recycling programmes for old tubes.
Some communities have designated drop-off points for hazardous waste.
Check if your local council provides collection services for hazardous materials.
Remember, following electrical safety tips during disposal is crucial. Always handle tubes carefully to avoid breakage and potential injury.
When it’s time to get rid of your old fluorescent tube, it’s important to do it safely. These tubes contain materials that can be harmful to the environment if not disposed of properly. Check with your local recycling centre for the best way to recycle them. For more tips on how to handle your waste responsibly, visit our website!
Final Thoughts
Changing a fluorescent tube light at home is not as hard as it seems. By following the steps carefully, you can do it safely and easily. Remember to always turn off the power before starting, and take your time to avoid any mistakes. If you find it tricky, don’t hesitate to ask for help. With a bit of practise, you’ll be able to replace those lights in no time, keeping your home bright and welcoming.
Frequently Asked Questions
What types of fluorescent tubes are available?
There are several types of fluorescent tubes, including T5, T8, and T12, which vary in size and energy efficiency.
What are common problems with fluorescent lights?
Common issues include flickering, buzzing sounds, and tubes that do not light up at all.
How can I safely replace a fluorescent tube?
Always turn off the power before starting. Use a stepladder if needed and handle the tubes carefully.
What tools do I need to change a fluorescent tube?
You typically need a screwdriver, a stepladder, and possibly a voltage tester to ensure safety.
Can I recycle old fluorescent tubes?
Yes, you can recycle them, but be sure to check local regulations as they contain small amounts of mercury.
How do I know if my fluorescent tube needs replacing?
If the light flickers, is dim, or does not turn on, it may be time to replace the tube.