Fixing a lightbulb that won't turn on can be frustrating, but understanding the common issues and solutions can make the process much easier. Whether it's a simple problem like a burned-out bulb or something more complex, this guide will help you troubleshoot effectively and safely. Here’s what you need to know to get your lamp shining bright again.
Key Takeaways
- Always check the power source first; it could be as simple as a tripped circuit breaker.
- Inspect the lightbulb for damage; a burned-out bulb is often the main culprit.
- Make sure the light switch is functioning properly; a faulty switch can prevent the lamp from turning on.
- If the bulb and switch are fine, examine the wiring and socket for any issues.
- Consider upgrading to energy-efficient bulbs to reduce future problems and save on electricity.
Lightbulbs come in various types, each serving a unique purpose. Here are some common types:
Key Point: Each type has its own lifespan and energy consumption.
Several factors can lead to a lightbulb not working:
Before attempting to fix a lightbulb, always remember:
Always prioritise safety when dealing with electrical devices. A power surge can cause significant damage, so take precautions seriously!

Before diving into more complex issues, ensure the power source is functioning. Check if the outlet is working by plugging in another device. If that device doesn’t work either, the problem may lie with the circuit breaker or the outlet itself.
Next, examine the light switch. Look for any signs of damage or wear. If the switch feels loose or doesn’t click properly, it might be faulty. You can test it by turning it on and off several times. If it seems to be the issue, consider replacing it.
Finally, check the lightbulb socket. Look for the socket tab; if it’s pressed down too far, it may not make contact with the bulb. You can gently bend it up to ensure a good connection. If the socket appears damaged or if there’s a bad connection, it may need replacing.
| Step | Action | Notes |
|---|---|---|
| 1 | Check outlet | Plug in another device |
| 2 | Inspect switch | Look for damage |
| 3 | Examine socket | Check for faulty socket |
Remember, safety first! Always turn off the power before working on electrical components.
By following these initial steps, you can often identify the cause of a lightbulb that won’t turn on. If these checks don’t resolve the issue, further investigation may be necessary.
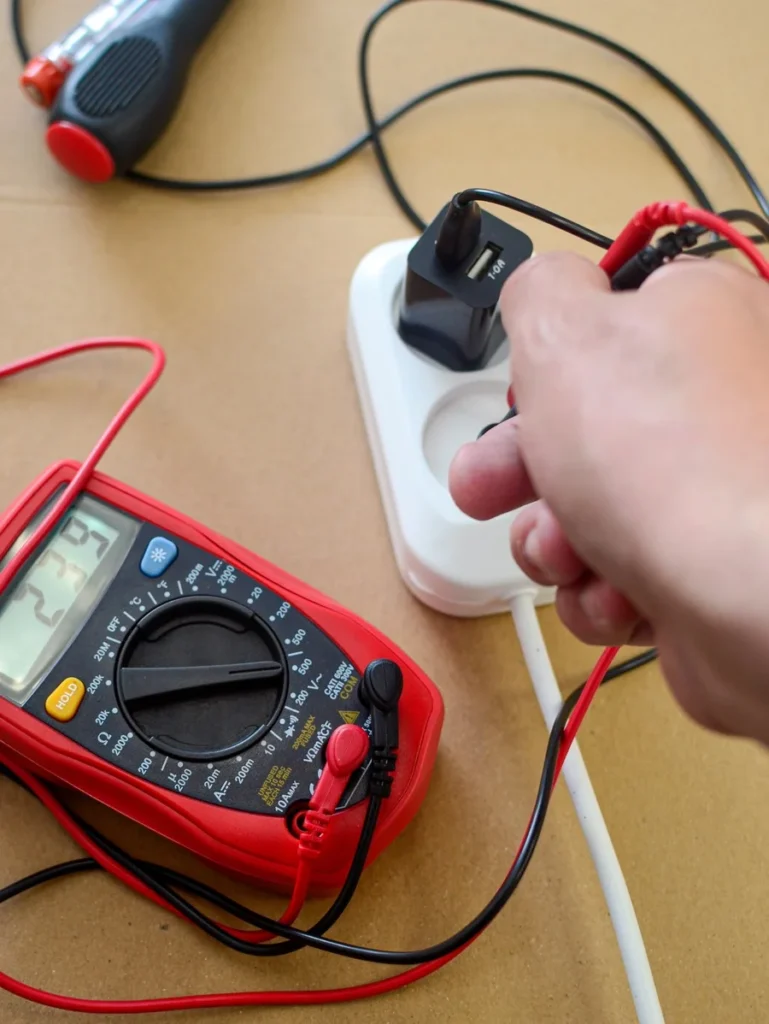
To check if your lightbulb is getting power, you can use a multimeter. Here’s how:
Look for any visible signs of damage in the wiring. This can include:
If the bulb and wiring seem fine, the light fixture itself might be the problem. Here’s what to do:
Remember, safety first! Always turn off the power before working on electrical fixtures. If you’re unsure, it’s wise to consult a professional.
| Test | What to Check | Tools Needed |
|---|---|---|
| Voltage Test | Power supply to the socket | Multimeter |
| Wiring Inspection | Damage or wear on wires | Visual inspection |
| Fixture Test | Power to the light fixture | Multimeter |
When selecting a new bulb, ensure it matches the light fixture specifications. Consider the following:
To install the new bulb safely:
Old bulbs can be hazardous, especially if they are broken. Follow these steps for safe disposal:
Remember: If the new bulb doesn’t light up, check for issues like a loose socket or faulty wiring. Always ensure that the electrical contact is secure to avoid problems like flickering or a burnt-out bulb.
If you encounter any of the following signs, it’s time to seek help:
While many lightbulb issues can be fixed at home, some situations are best left to professionals. Consider the following:
When you decide to call a professional, ensure you choose wisely. Here are some tips:
If you notice sparks or burning, call a qualified electrician immediately. Recent work on walls or ceilings may have loosened or pierced electrical cables. If so, the cables may need to be replaced.
To keep your light fixtures in good shape, consider these simple tips:
Switching to energy-efficient bulbs can save you money and reduce light pollution. Dimmers, motion sensors, and timers can help to lower average illumination levels and save even more energy. Consider using:
To avoid future issues, make sure your bulbs are installed correctly:
Remember, taking safety precautions is key when dealing with electrical items. Regular checks can save you from bigger problems later on!
To prevent future problems, it's essential to take proactive steps today. Regular maintenance and timely repairs can save you from bigger issues down the line. Don't wait until it's too late—visit our website to find skilled tradesmen in Cornwall who can help you keep your home in top shape!
In summary, fixing a lamp that won’t turn on can often be straightforward. Start by checking the power source and ensuring the outlet is functional. If the outlet works, inspect the light bulb for any damage, and replace it if necessary. Next, examine the lamp switch for any faults, and if it’s broken, consider replacing it. If the lamp still doesn’t work, there may be issues with the wiring or the socket, which might require professional help. By following these steps, you can troubleshoot and resolve most common lamp issues, ensuring your space remains well-lit.
If your lamp won’t turn on even after checking the power source, bulb, and switch, it might be time to look at the wiring or call an electrician.
You can check if the bulb is burned out by removing it and looking for a broken filament or dark spots inside. If it looks damaged, replace it.
If you have some basic knowledge of wiring, you can replace a lamp switch. However, if you’re unsure, it’s best to hire a professional.
Signs of a faulty socket include the bulb not lighting up, visible damage to the socket, or a loose connection when you insert the bulb.
No, you should use the type of bulb recommended for your lamp. Check the wattage and type specified on the lamp.
Regularly check your lamp for loose connections, use the correct bulbs, and avoid overloading the circuit to help prevent future problems.
Disclaimer: The information provided in this blog is for general informational purposes only and should not be considered a substitute for professional advice. All work, including but not limited to electrical, plumbing, and construction, carries risks and should only be undertaken by qualified professionals. For specific guidance on any work, consult a certified professional in the relevant field. Always ensure compliance with local regulations and safety standards.
