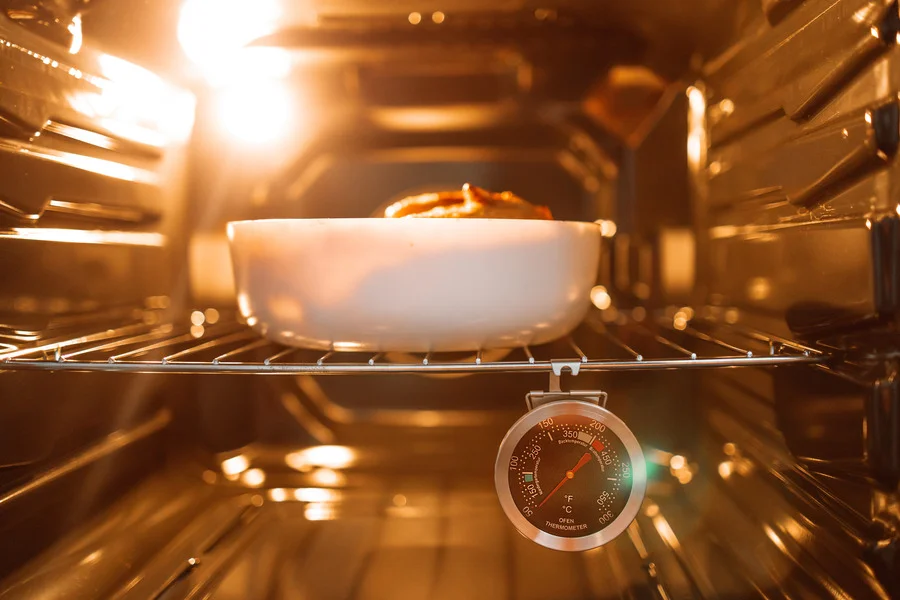
Replacing the lightbulb in your oven may seem like a small task, but it plays a crucial role in cooking. The oven light helps you see your food without having to open the door, which can let heat escape. If your oven light is out, don't worry! This guide will walk you through the easy steps to replace it safely and effectively.
Key Takeaways
Always ensure the oven is completely cool before starting the replacement.
Use gloves to protect your hands from sharp edges and to grip the bulb securely.
Locate the lightbulb according to your oven's manual if you're unsure.
Handle the new bulb carefully to avoid damaging it, especially halogen bulbs.
If the new bulb doesn't work, double-check the installation and consider other electrical issues.
Understanding the Importance of Oven Lightbulbs
Why Oven Lightbulbs Are Different
Oven lightbulbs, often referred to as oven lamps, are specially designed to withstand high temperatures. Regular bulbs cannot handle the heat inside an oven, which is why it’s crucial to use the right type. These bulbs are made to endure the heat and provide reliable lighting when you need it most.
Common Types of Oven Lightbulbs
There are mainly two types of oven lightbulbs:
Incandescent Bulbs: Typically 40 watts, these are the most common.
Halogen Bulbs: These can go up to 50 watts and are more energy-efficient.
Type
Wattage
Lifespan
Incandescent
40W
1,000 hours
Halogen
50W
2,000 hours
Safety Precautions When Handling Oven Lightbulbs
When replacing an oven lightbulb, safety is key. Here are some important precautions:
Ensure the oven is cool before starting.
Disconnect the power to avoid any electrical hazards.
Use gloves to prevent oils from your skin damaging the new bulb.
Remember, the lightbulb in your oven is not just for illumination; it helps you monitor your cooking without opening the door, which can affect cooking times and temperatures. Replacing it promptly ensures you maintain visibility while cooking.
Gathering the Necessary Tools and Materials
When it comes to replacing a lightbulb in your oven, having the proper tools for repair is essential. Here’s what you’ll need:
Essential Tools for the Job
Screwdriver (flathead and Phillips)
Pliers
Safety gloves
A clean cloth
Choosing the Right Replacement Bulb
Make sure to select a bulb that is specifically designed for ovens. Here are some common types:
Bulb Type
Wattage
Description
Halogen
40W
Bright light, heat resistant
Incandescent
40W
Standard oven bulb
LED
10W
Energy-efficient option
Additional Materials You Might Need
Replacement bulb
Electrical tape (if needed)
Cleaning solution for the bulb area
Tip: Always ensure that the oven is completely cool before starting the replacement process. This will help prevent any accidents or injuries while you work.
Preparing Your Oven for Lightbulb Replacement
Ensuring the Oven is Cool
Before you start, make sure your oven is completely cool. This is crucial for your safety. If you’ve just finished cooking, wait for the oven to cool down before proceeding.
Disconnecting the Oven from Power
To avoid any electrical hazards, it’s best to disconnect the oven from power. You can do this by unplugging it or turning off the circuit breaker. This step is essential to ensure your safety while working on the oven light replacement.
Locating the Oven Lightbulb
Finding the oven lightbulb can sometimes be tricky. Here are some tips to help you:
Check the user manual for your oven model to find the exact location of the bulb.
Use a flashlight to illuminate the area if it’s hard to see.
The bulb is usually located behind a light box cover that may need to be removed.
Remember, regular checks on your oven light can prevent cooking in the dark. If the bulb is burnt out, replace it immediately to maintain visibility while cooking.
By following these steps, you’ll be well-prepared to replace your oven lightbulb safely and effectively. If you encounter any issues, don’t hesitate to troubleshoot appliance lighting problems before proceeding further.
Removing the Old Lightbulb
Accessing the Lightbulb Cover
To begin, ensure your oven is completely cool. This is crucial for your safety. Next, locate the lightbulb cover, which is usually found at the back or side of the oven. If it’s a glass cover, gently unscrew it by turning it counterclockwise. If there’s a panel, you may need a screwdriver to remove it. Remember to keep the screws in a safe place for later use.
Safely Removing the Lightbulb
Once the cover is off, you can now access the light compartment. Wearing gloves, carefully unscrew the old bulb by turning it counterclockwise. If it’s a push-and-turn type, push it in slightly while turning. Be cautious not to apply too much force, as this could break the bulb.
Inspecting the Lightbulb Socket
After removing the old bulb, take a moment to inspect the socket. Look for any signs of damage or debris. If everything seems fine, you’re ready to proceed with installing the new bulb. If you notice any issues, it might be best to consult a professional before continuing.
Remember, handling lightbulbs can be tricky. Always prioritise safety and take your time during this process!
Installing the New Lightbulb
Handling the New Lightbulb
When you have your new lightbulb ready, make sure to handle it carefully. Use a tissue or cotton gloves to avoid getting oils from your skin on the bulb, which can cause it to burn out faster. Here’s how to proceed:
Check the bulb specifications to ensure it matches your oven’s requirements.
Gently screw the new bulb into the light socket, turning it clockwise until it is secure.
Avoid using excessive force; it should fit snugly without needing to be overly tightened.
Securing the Lightbulb in Place
After installing the new bulb, it’s time to put everything back together:
If your oven has a cover, replace it by turning it clockwise until it’s secure.
Ensure that any screws or clips are properly fastened to hold the cover in place.
Double-check that everything is aligned correctly to prevent any issues later.
Testing the New Lightbulb
Finally, it’s crucial to test the new lightbulb:
Restore power to the oven by plugging it back in or turning on the circuit breaker.
Switch on the oven light to see if it illuminates.
If it doesn’t light up, double-check your installation to ensure everything is connected properly.
Remember, if the lightbulb doesn’t work after installation, it might be a sign of a deeper issue. In that case, consult a professional for help.
Reassembling and Testing Your Oven
Reattaching the Lightbulb Cover
Once you have installed the new lightbulb, it’s time to put everything back together. Make sure the cover is secure to prevent any dust or grease from getting inside. Follow these steps:
Align the cover with the bulb.
Gently screw it back in or clip it into place.
Ensure it’s tight but not overly forceful to avoid breaking it.
Restoring Power to the Oven
After securing the cover, you can reconnect your oven to the power supply. Here’s how:
Plug the oven back into the socket.
If you turned off the circuit breaker, switch it back on.
Double-check that everything is in order before proceeding.
Testing the Oven Light
Finally, it’s time to test your new lightbulb. Here’s what to do:
Turn on the oven light switch.
Observe if the light illuminates.
If it doesn’t work, revisit the previous steps to ensure everything was done correctly.
Remember, proper oven maintenance is key to ensuring your appliance works efficiently. If the light still doesn’t turn on, it might be time to consult a professional for further assistance.
Troubleshooting Common Issues
Lightbulb Does Not Turn On
If your oven light is not illuminating, the first step is to check the power supply. Here are some common reasons:
The bulb may be burnt out.
The oven might not be plugged in properly.
A circuit breaker could have tripped.
Lightbulb Flickers
A flickering lightbulb can be annoying. This issue might be caused by:
If you notice strange smells or sounds when the light is on, it’s important to act quickly. Possible causes include:
Overheating of the bulb.
A loose or broken connection in the wiring to the elements.
Burnt wiring, which can be dangerous.
Always prioritise safety when dealing with electrical issues. If you are unsure, consult a professional.
Issue
Possible Cause
Solution
Light does not turn on
Burnt bulb, unplugged, tripped circuit
Replace bulb, check power
Light flickers
Loose connection, faulty bulb
Tighten or replace bulb
Unusual smells or noises
Overheating, burnt wiring
Turn off oven, seek help
If you're facing issues, don't worry! Many common problems can be easily fixed. For more help and tips, visit our website and discover how we can assist you further. Your next step towards a solution is just a click away!
Final Thoughts on Replacing Your Oven Light Bulb
Changing the light bulb in your oven is a simple task that anyone can do. By following the steps outlined in this guide, you can ensure that your oven is well-lit and ready for cooking. Remember to always prioritise safety by turning off the power and allowing the oven to cool down before starting. If you encounter any difficulties, don’t hesitate to consult your oven’s manual or seek professional help. With a little care, you can keep your oven functioning properly and enjoy cooking with ease.
Frequently Asked Questions
What types of lightbulbs are used in ovens?
Ovens typically use special bulbs that can handle high temperatures. Common types include incandescent and halogen bulbs.
Is it safe to use my oven without a working lightbulb?
Yes, you can still use your oven without a lightbulb, but it will be harder to see what’s cooking inside.
How do I know if the bulb is the problem?
If the oven light doesn't turn on, first check if the oven is plugged in and the circuit breaker is fine. If everything is okay, the bulb might be burnt out.
Can I replace the oven lightbulb myself?
Absolutely! Changing the oven lightbulb is a simple task that most people can do on their own.
How long should an oven lightbulb last?
Typically, an oven lightbulb can last anywhere from 1,000 to 2,000 hours, depending on usage.
What should I do if the new bulb doesn’t work?
If the new bulb doesn’t light up, double-check that it’s installed correctly. If it still doesn’t work, there may be an issue with the socket or wiring.
Looking for the all-in-one platform to connect your trades business with Cornish locals?
Disclaimer: The information provided in this blog is for general informational purposes only and should not be considered a substitute for professional advice. All work, including but not limited to electrical, plumbing, and construction, carries risks and should only be undertaken by qualified professionals. For specific guidance on any work, consult a certified professional in the relevant field. Always ensure compliance with local regulations and safety standards.