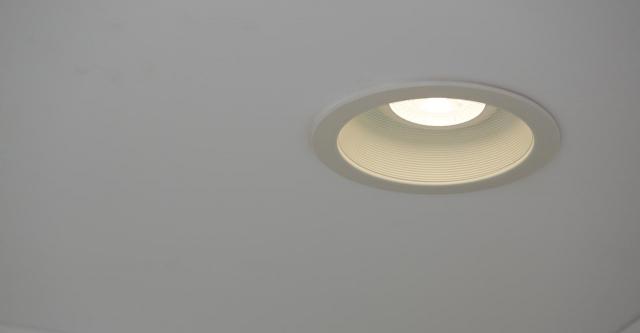
Replacing a recessed light fixture can seem tricky, but with the right steps and tools, it’s a job you can handle yourself. This guide will walk you through the process, making it easier to brighten up your space and ensure everything works safely.
Key Takeaways
- Recessed lights come in various styles and sizes, so choose one that fits your space.
- Always turn off the power before starting any electrical work to stay safe.
- Inspect the wiring carefully when removing the old fixture to avoid any issues.
- Make sure the new fixture is securely fastened to prevent it from falling.
- Regular maintenance, like cleaning and checking bulbs, keeps your lights working well.
Recessed lighting is a popular choice for many homes, providing a clean and modern look. These lights are installed into the ceiling, creating a seamless appearance. Here’s a closer look at the different aspects of recessed lighting:
Recessed lights come in various styles, including:
There are several advantages to using recessed lights:
While recessed lighting is great, there can be problems:
Recessed lighting can transform a space, but it’s important to understand the types and benefits before making a decision. Whether you want to replace recessed lighting or upgrade to LED recessed lighting, knowing your options is key.
When you're ready to replace a recessed light fixture, it's important to have the right tools and materials on hand. Gathering everything you need beforehand will make the process smoother. Here’s what you’ll require:
When selecting a new fixture, consider:
Before starting, make sure to wear:
Always remember to turn off the power at the circuit breaker before you begin any electrical work. This will help prevent accidents and ensure your safety.
By preparing with the right tools and materials, you can confidently tackle the task of replacing your recessed light fixture. This preparation is key to a successful installation, especially when replacing recessed fluorescent light fixture with an energy-efficient LED.
Before you start, always turn off the power to the light fixture at the circuit breaker. This is crucial for your safety. You can check if the power is off by using a voltage tester.
Once the old fixture is out, take a moment to inspect the wiring. Look for any signs of damage or wear. If you see anything unusual, it’s best to consult a professional.
Always ensure that the wiring is in good condition before installing a new fixture. This can prevent future issues and ensure safety.

Remember, safety first! Always ensure the power is off before starting any electrical work.
By following these steps, you can successfully replace the light fixture and enjoy your new recessed lighting. If you encounter any issues, refer to a light fixture replacement guide for further assistance.
When dealing with recessed lighting, you may encounter a few common issues. Here’s how to tackle them effectively:
Flickering lights can be annoying and may indicate a problem. Here are some steps to resolve this:
A loose fixture can be both a safety hazard and an eyesore. To fix this:
Proper insulation is crucial for energy efficiency. Here’s how to check:
Remember, safety first! Always turn off the power before attempting any repairs or adjustments.
By following these steps, you can effectively troubleshoot and maintain your recessed lighting, ensuring a well-lit and safe environment.

To keep your recessed lights looking their best, regular cleaning is essential. Here are some tips:
When it’s time to change the bulbs, follow these steps to do it safely:
Consider switching to energy-efficient bulbs. They last longer and save you money on your electricity bill. Here are some options:
Regular maintenance can extend the life of your recessed lighting. Always ensure that connections are secure and check for any signs of wear or damage. If you notice any issues, it’s best to consult a professional.
By following these simple steps, you can keep your recessed lighting in great shape for years to come!
To keep your recessed lighting in top shape, regular checks are essential. Make sure to clean the fixtures and replace any burnt-out bulbs promptly. If you need help or want to learn more about lighting maintenance, visit our website for expert tips and local tradesmen ready to assist you!
Replacing a recessed light fixture can seem tricky, but with the right tools and steps, it’s quite manageable. Always remember to turn off the power before you start, and take your time to ensure everything is done safely. Once you’ve installed your new fixture, you’ll not only brighten up your space but also feel proud of your handy work. Whether you’re updating an old light or adding a new one, this task can really enhance the look of your home.
Recessed lighting is a type of light that is installed into the ceiling. It creates a clean look since the light fixture is hidden.
To find the right size, measure the hole where the old light was. Most lights come in standard sizes, so it should be easy to find one that fits.
Yes, you can replace it yourself if you follow safety steps. Just make sure to turn off the power before you start.
If the new light doesn’t work, check if the power is on. You might also want to check the wiring to see if it’s connected properly.
You should clean your recessed lights every few months. Dust can build up and make them less bright.
Yes, many recessed lights are energy-efficient, especially if you choose LED bulbs. They use less energy and last longer.
Disclaimer: The information provided in this blog is for general informational purposes only and should not be considered a substitute for professional advice. All work, including but not limited to electrical, plumbing, and construction, carries risks and should only be undertaken by qualified professionals. For specific guidance on any work, consult a certified professional in the relevant field. Always ensure compliance with local regulations and safety standards.