
After a storm, it’s crucial to check your roof for any damage. High winds and heavy rain can cause issues that, if left unchecked, might lead to costly repairs down the line. Here are some key tips to help you inspect your roof and keep your home safe.
Key Takeaways
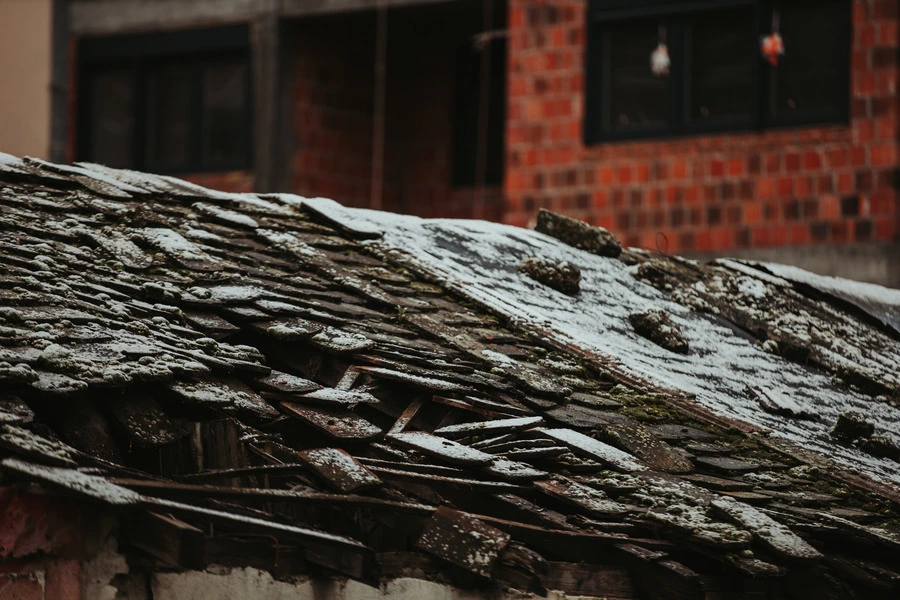
- Look for cracked or missing shingles after a storm.
- Ensure your gutters are clear to avoid water damage.
- Check for leaks around chimneys and vents.
- Inspect for moss or algae growth which can harm your roof.
- Assess the overall condition of your roof structure.
After a storm, it’s crucial to check your roof shingles for any signs of damage. Protecting your home against storms starts with a thorough inspection. Here are some key areas to focus on:
Regular inspections can help you catch signs of roof damage early, saving you from costly repairs later on.
By following these steps, you can ensure your roof remains in good condition after a storm. Remember, if you’re unsure about the extent of the damage, it’s always best to consult a professional.
Chimney flashing is crucial for preventing leaks. Check for any gaps or cracks around the flashing where it meets the chimney. If you notice any issues, it’s important to address them quickly to avoid water damage.
Vent pipe flashing should be inspected for signs of wear. Look for:
Skylights can be a source of leaks if not properly sealed. Ensure that:
Regular checks on your roof flashing can save you from costly repairs later. Ignoring small issues can lead to bigger problems down the line, so it’s best to stay proactive.
To keep your home safe from water damage prevention, it’s essential to regularly clear your gutters. Here’s how:
Check that your downspouts are firmly attached and functioning properly. Follow these steps:
Regularly inspect for leaks or blockages in your guttering system. Here’s what to do:
Keeping your guttering and drainage maintenance up to date is crucial for preventing costly repairs in the future. Regular checks can save you time and money!
Proper ventilation is crucial for maintaining the health of your roof. Good airflow helps prevent moisture build-up, which can lead to serious damage over time. Here are some key areas to check:
Regular checks of your roof ventilation systems can save you from costly repairs in the future. Keeping your roof well-ventilated is essential for its longevity and performance.
Moisture in your roof insulation can lead to serious problems. Look for signs of dampness or mould, as these can indicate leaks or poor ventilation. Regular checks can help maintain your home's energy efficiency.
The thickness of your insulation is crucial for keeping your home warm. Ideally, it should be at least 270mm for optimal performance. You can measure it by lifting a corner of the insulation and checking its depth.
Pests can damage your insulation and create further issues. Look for:
Regular inspections of your roof insulation can prevent costly repairs and ensure your home remains comfortable and energy-efficient.
By keeping an eye on these aspects, you can maintain a safe and efficient roof system.

After a storm, it’s crucial to check your roof valleys for any debris build-up. Leaves, twigs, and other materials can block water flow, leading to potential leaks. Here are some steps to follow:
Look closely at the roof valleys for any signs of wear. Damaged valleys can lead to serious issues. Consider these points:
Proper water flow is essential to prevent leaks. To ensure this:
Regular inspections of your roof valleys can help prevent costly repairs in the future. Roofing maintenance is essential, especially after severe storms.
By following these tips, you can keep your roof valleys in good condition and protect your home from water damage.

When examining the junction between your chimney and roof, look for cracks or gaps in the mortar joints. These can allow water to seep in, leading to further damage. Regular checks are essential, especially after severe weather. Here are some key points to consider:
Water stains can indicate a problem at the junction. If you notice any, it’s crucial to investigate further. Ignoring these signs can lead to bigger issues down the line. Here’s what to do:
Proper sealing is vital to prevent leaks. Make sure that the flashing around the chimney is intact and well-sealed. Here are some tips:
Regular maintenance of your chimney and roof junctions is essential, especially in British weather conditions. Keeping an eye on these areas can save you from costly repairs later on.
Moss and algae can be a common problem for roofs, especially in wetter weather. Here are some tips to help you manage this issue:
Keeping your roof clean and well-maintained can help prevent moss and algae from becoming a bigger problem. Regular inspections and cleaning are key to a healthy roof.
When it comes to maintaining your roof, underlayment is crucial. This layer acts as a barrier against moisture and can prevent leaks. Here’s what to check:
Regular checks of your roof's underlayment can save you from costly repairs in the future.
By following these steps, you can ensure that your roof remains in good condition and protects your home effectively. Remember, a well-maintained underlayment is key to a long-lasting roof!
When inspecting your roof, look for any sagging areas. These can indicate serious structural issues. If you notice any dips or unevenness, it’s crucial to address them promptly. Here are some steps to follow:
Roof trusses are vital for supporting your roof. Inspect them for:
To ensure your roof is stable, consider the following:
Regular roof inspections are key to extending your roof's lifespan and ensuring safety. After a storm, it’s especially important to check for any damage that could lead to bigger problems later on.
By following these tips, you can help maintain your roof's structural integrity and avoid costly emergency roof repairs in the future. Remember, proactive roof maintenance is essential for sustainable roofing solutions!
Inspecting the eaves and overhangs of your roof is crucial, especially after a storm. Look for signs of water damage, such as discolouration or peeling paint. These can indicate that water has penetrated the roof structure.
Pests can cause significant damage to your roof. Here are some signs to look for:
Proper sealing is essential to prevent water from entering your home. Make sure to:
Regular inspections are vital for preventative roof care. Addressing issues early can save you from costly repairs later on, especially considering the UK weather impact on roofs.
By following these steps, you can help ensure your roof remains in good condition, especially as you prepare for winter. Remember, winter roof preparation is key to avoiding major issues down the line!
When checking your roof eaves and overhangs, it's important to look for any signs of damage or wear. These areas protect your home from rain and snow, so keeping them in good shape is essential. If you notice any issues, don’t hesitate to reach out for help. For more tips and to find skilled tradesmen in Cornwall, visit our website today!
In conclusion, taking care of your roof after a storm is crucial for keeping your home safe and sound. Regular checks for leaks, missing tiles, and other damage can save you from bigger problems later on. If you notice anything unusual, don’t hesitate to call a professional for help. Remember, while some tasks can be done yourself, safety should always come first. Keeping your roof in good shape not only protects your home but also gives you peace of mind during the stormy seasons ahead.
If you find a leak, it's important to act quickly. Use buckets to catch the water and call a professional roofer to inspect and fix the issue.
Look for missing or broken tiles, water stains on the ceiling, or damp spots in the attic. These can be signs of roof damage.
Be careful when inspecting your roof. If it's safe to do so, use a ladder and watch out for slippery surfaces. If you're unsure, it's best to hire a professional.
If you see water overflowing from the gutters or if they are sagging, it may indicate a blockage. You should clear them to prevent water damage.
It's a good idea to check your roof and gutters at least twice a year and after any major storms.
While some minor repairs can be done yourself, it's safer to hire a professional for major repairs to avoid injury.
If a tree has fallen on your roof, stay indoors and call a professional to assess the damage and remove the tree safely.
Regular cleaning and trimming nearby trees can help prevent moss and algae growth. You can also use special treatments designed to inhibit their growth.
Disclaimer: The information provided in this blog is for general informational purposes only and should not be considered a substitute for professional advice. All work, including but not limited to electrical, plumbing, and construction, carries risks and should only be undertaken by qualified professionals. For specific guidance on any work, consult a certified professional in the relevant field. Always ensure compliance with local regulations and safety standards.